The Tecla Shield is also compatible with Samsung devices that have the Universal Switch accessibility feature. Check if your devices is compatible by going to Settings> Accessibility> Dexterity and Interaction and see if the Universal Switch feature is available.
To start your Tecla Shield should be in Switch Access / Switch Control Mode (Blinking purplish white). If you are not sure how to change modes check here: Mode Change Instructions
With the Tecla Shield ready for connection – the status indicator light should be blinking white and the switches should be connected to it - follow the steps below to set up your Android device with Universal Switch.
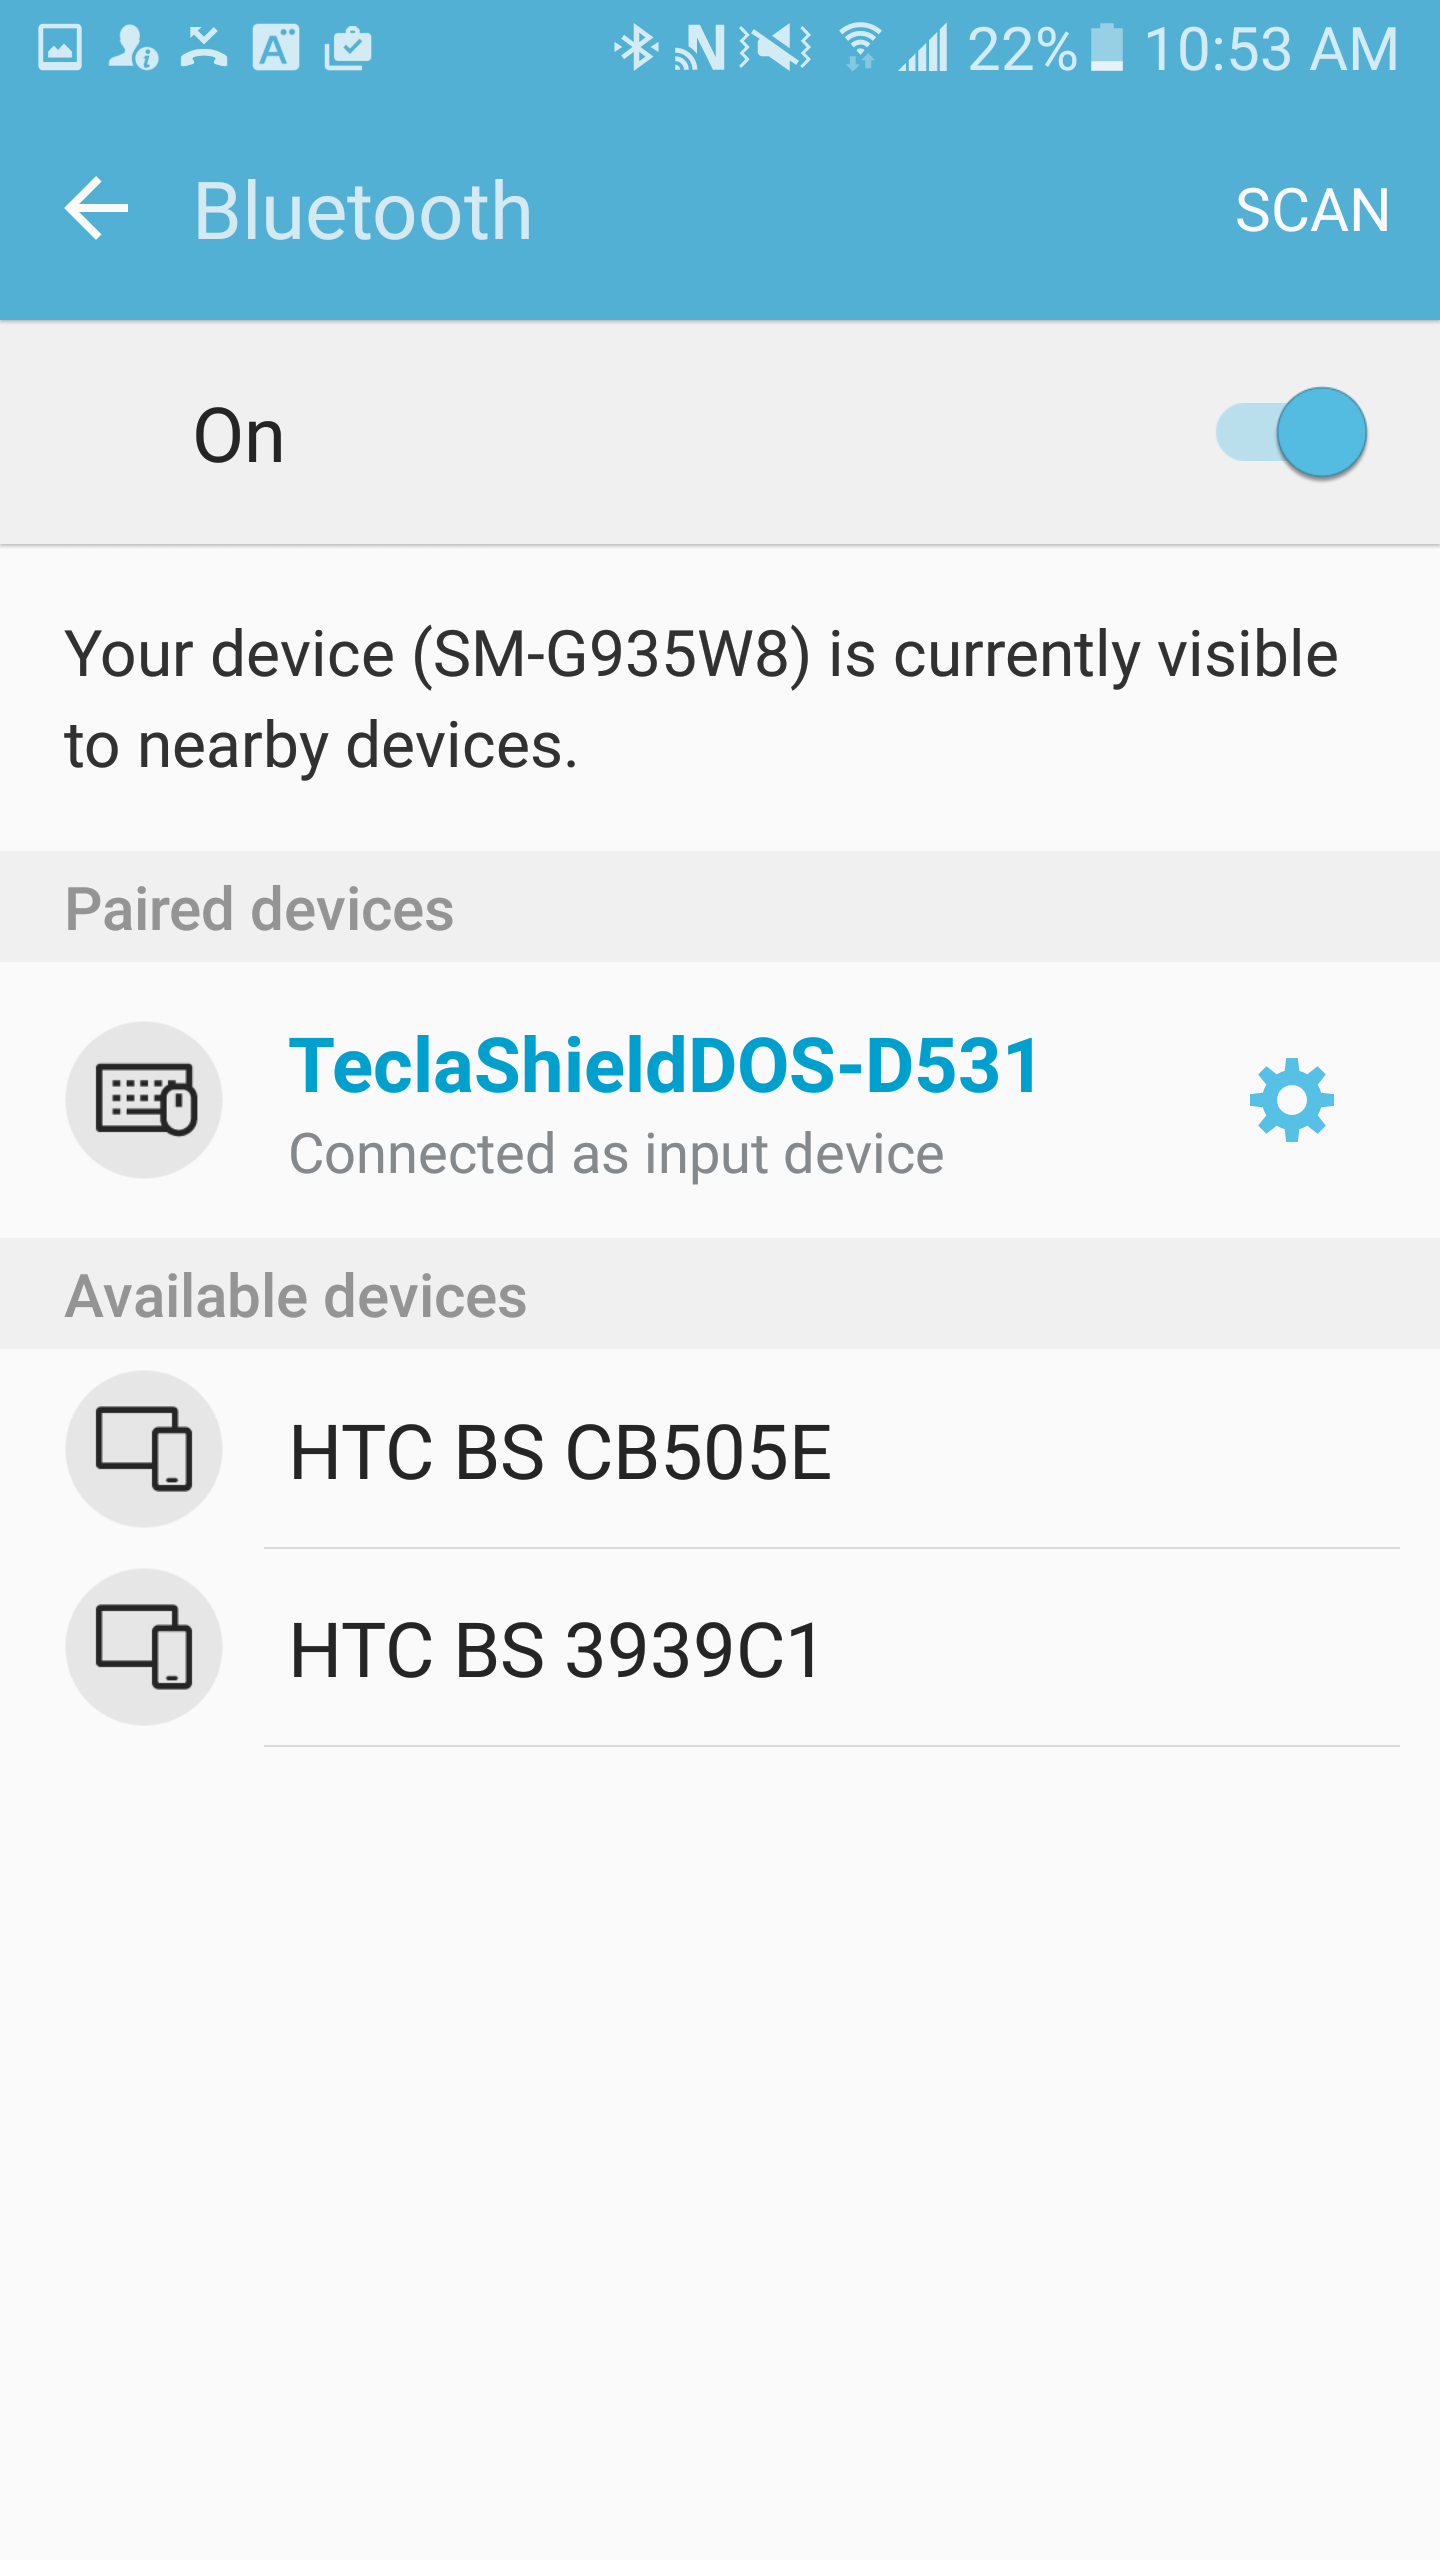
1. Pair your Tecla Shield: Go to Settings > Bluetooth. With Bluetooth enabled, you should see the Tecla Shield DOS listed under Available devices as TeclaShieldDOS-XXXX (where XXXX is a random sequence). Click on it. After a few seconds, TeclaShieldDOS-XXXX should be under Paired Devices and appear as Connected.

2. Set up a Smart Lock: Once the Tecla Shield is connected, you can set it as a trusted device. This will keep your device unlocked as long as the Tecla Shield is connected to it. If you have a screen lock type (i.e PIN, Pattern, Password), go to Settings > lock screen and security > Secure lock settings > smart lock. Enter the screen lock type that your phone has set up. Then select Trusted devices > Add Trusted Device > Bluetooth. Select TeclaShieldDOS-XXXX as your trusted device.
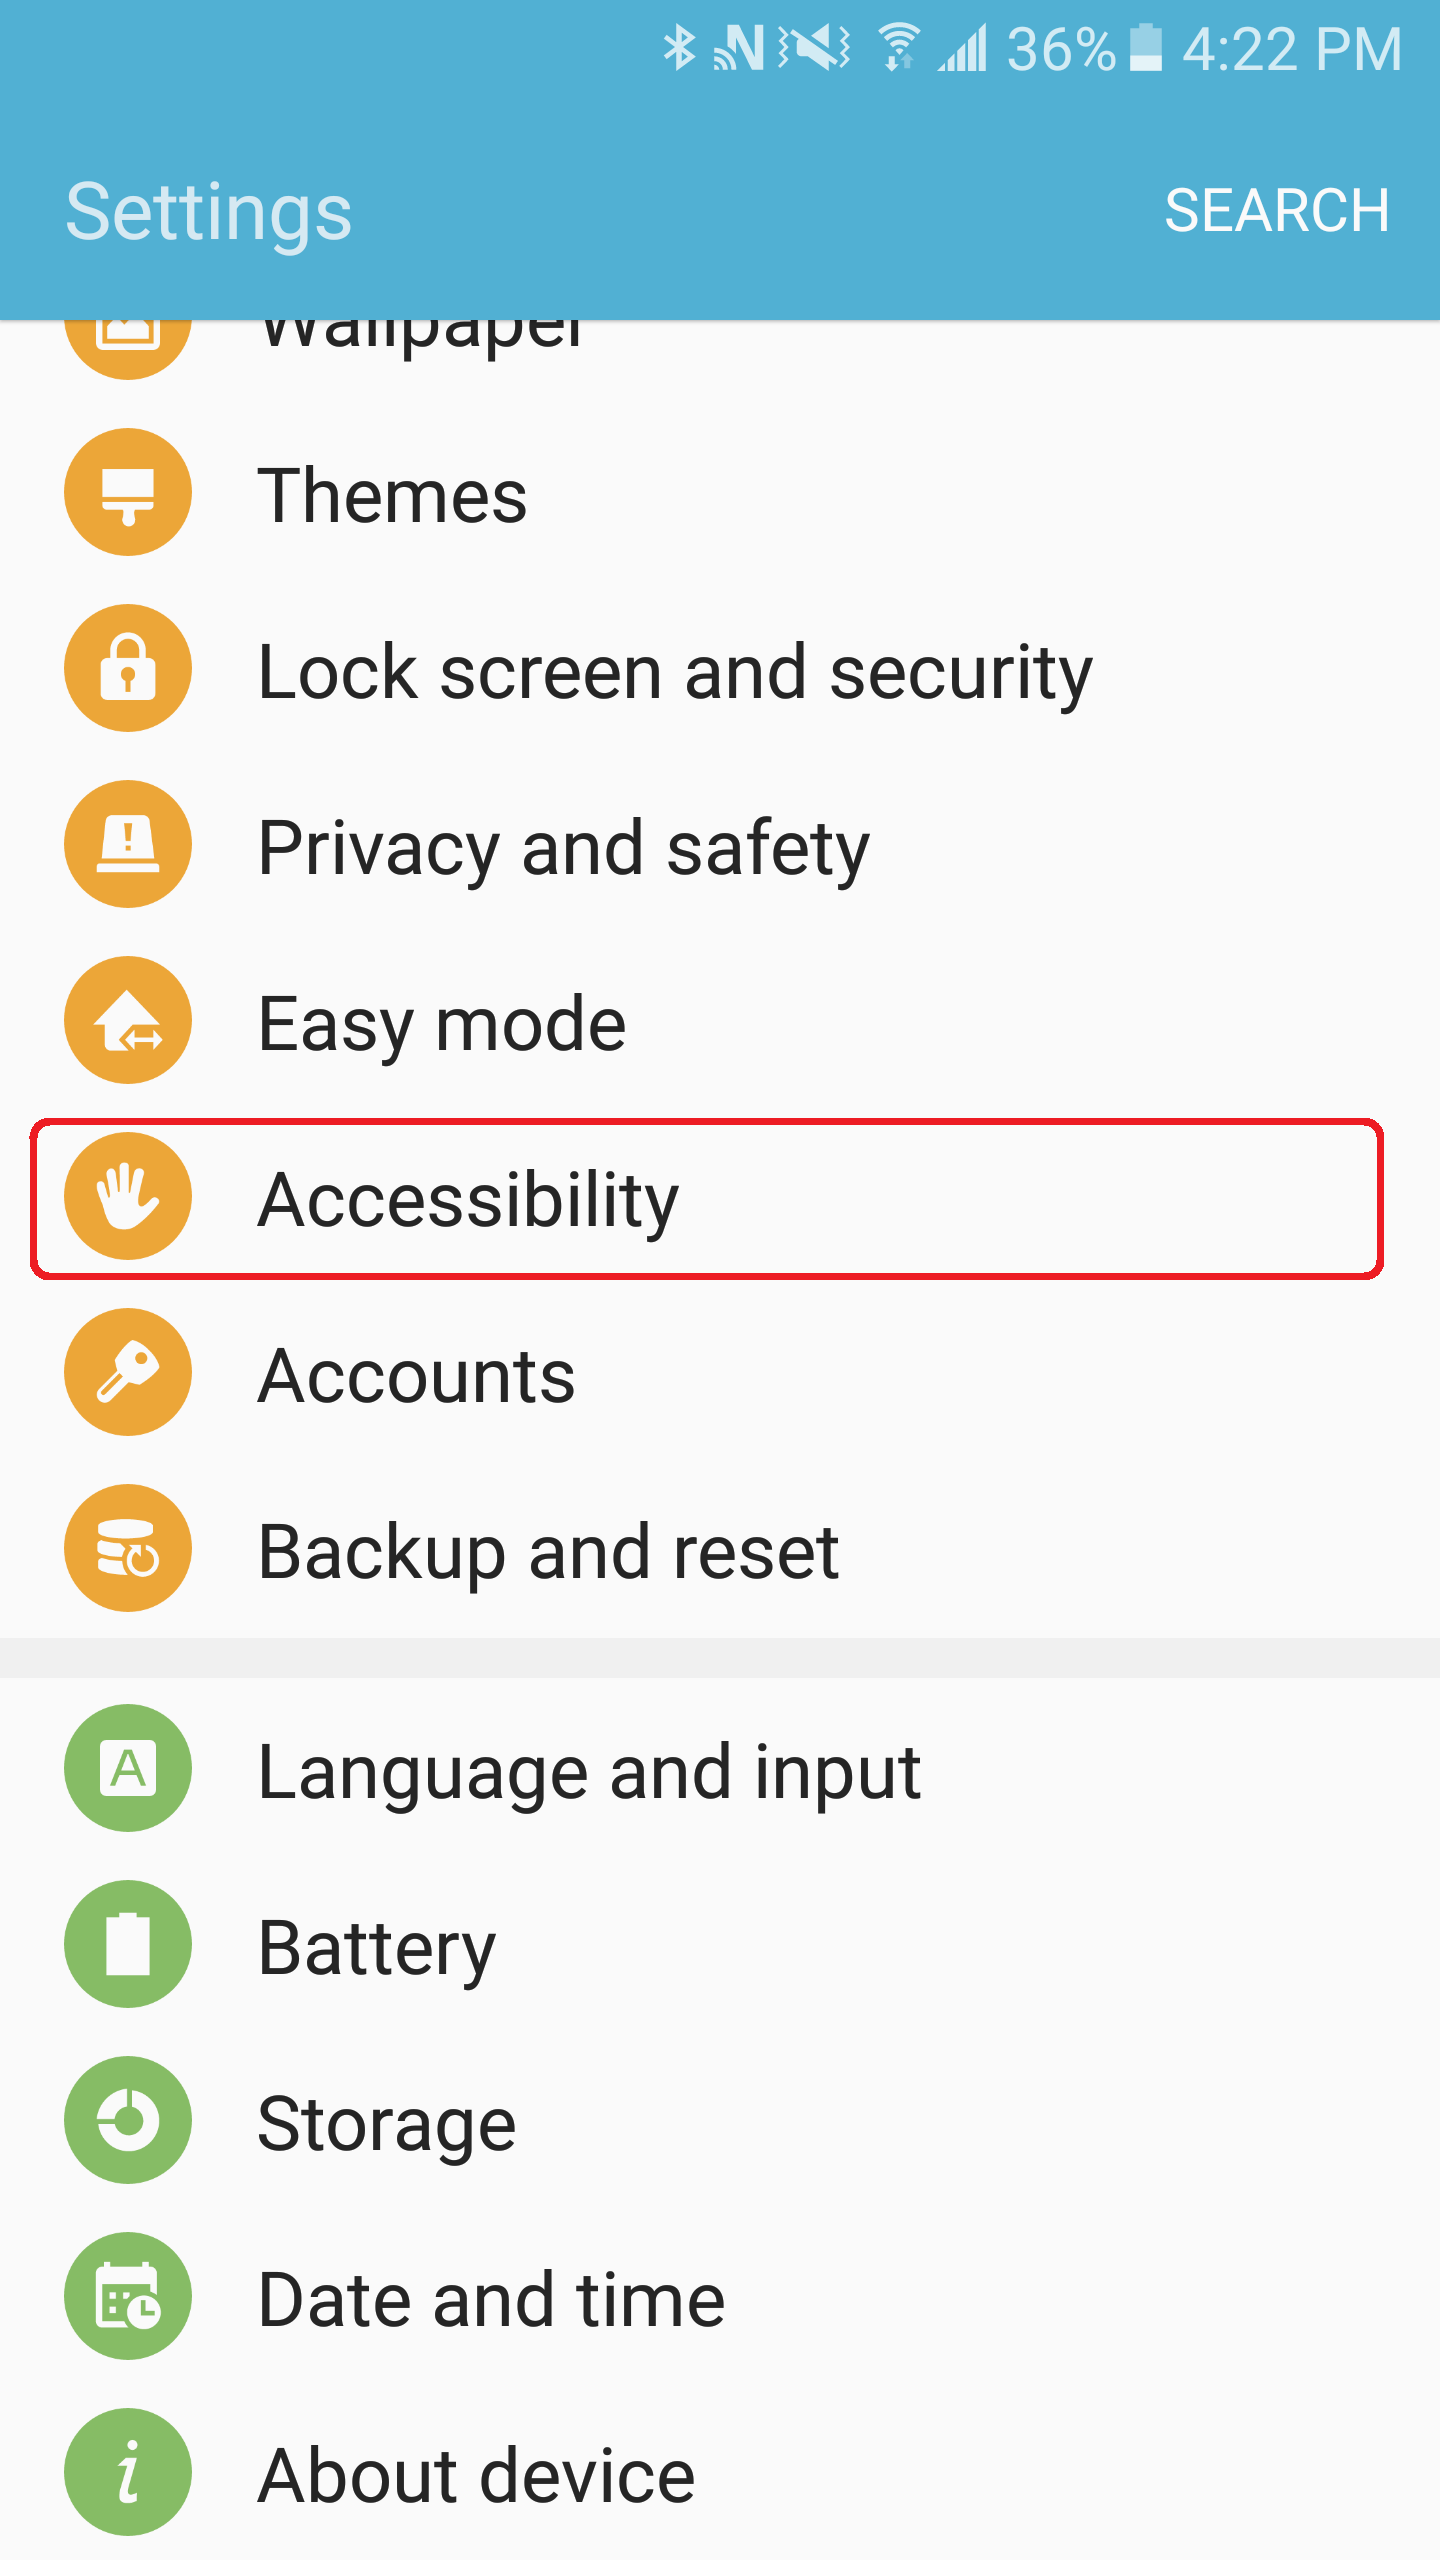
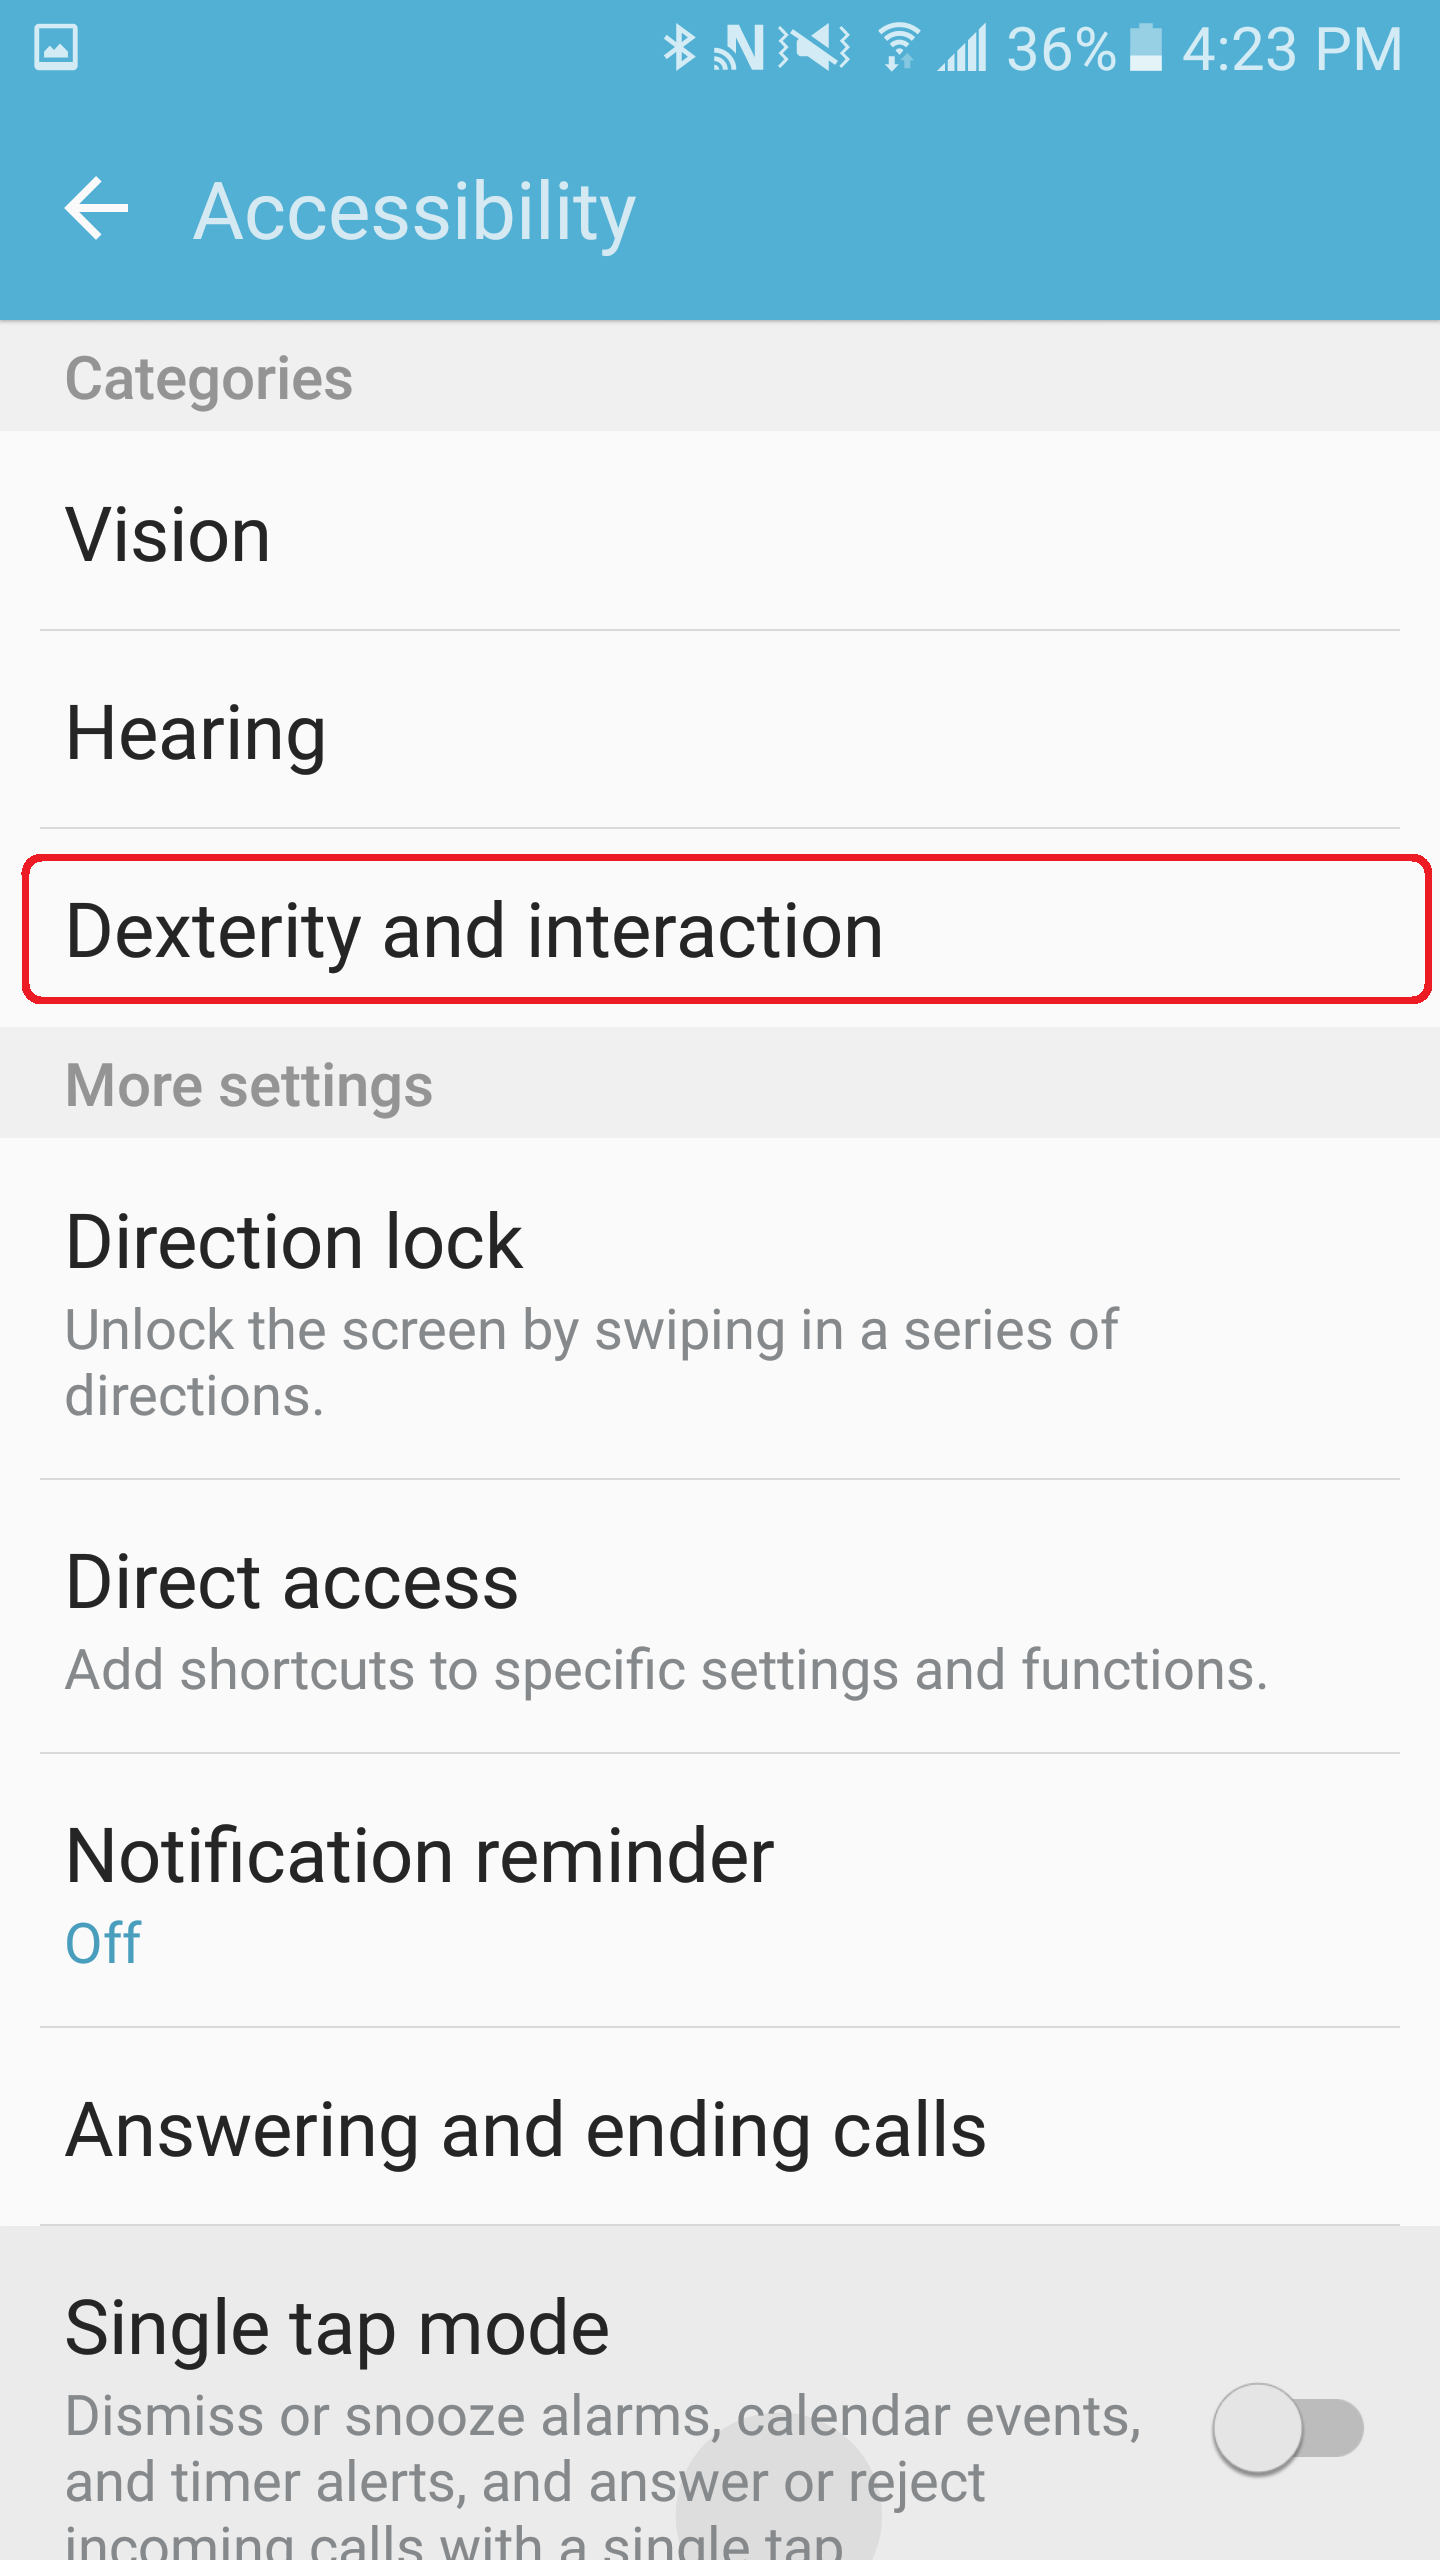
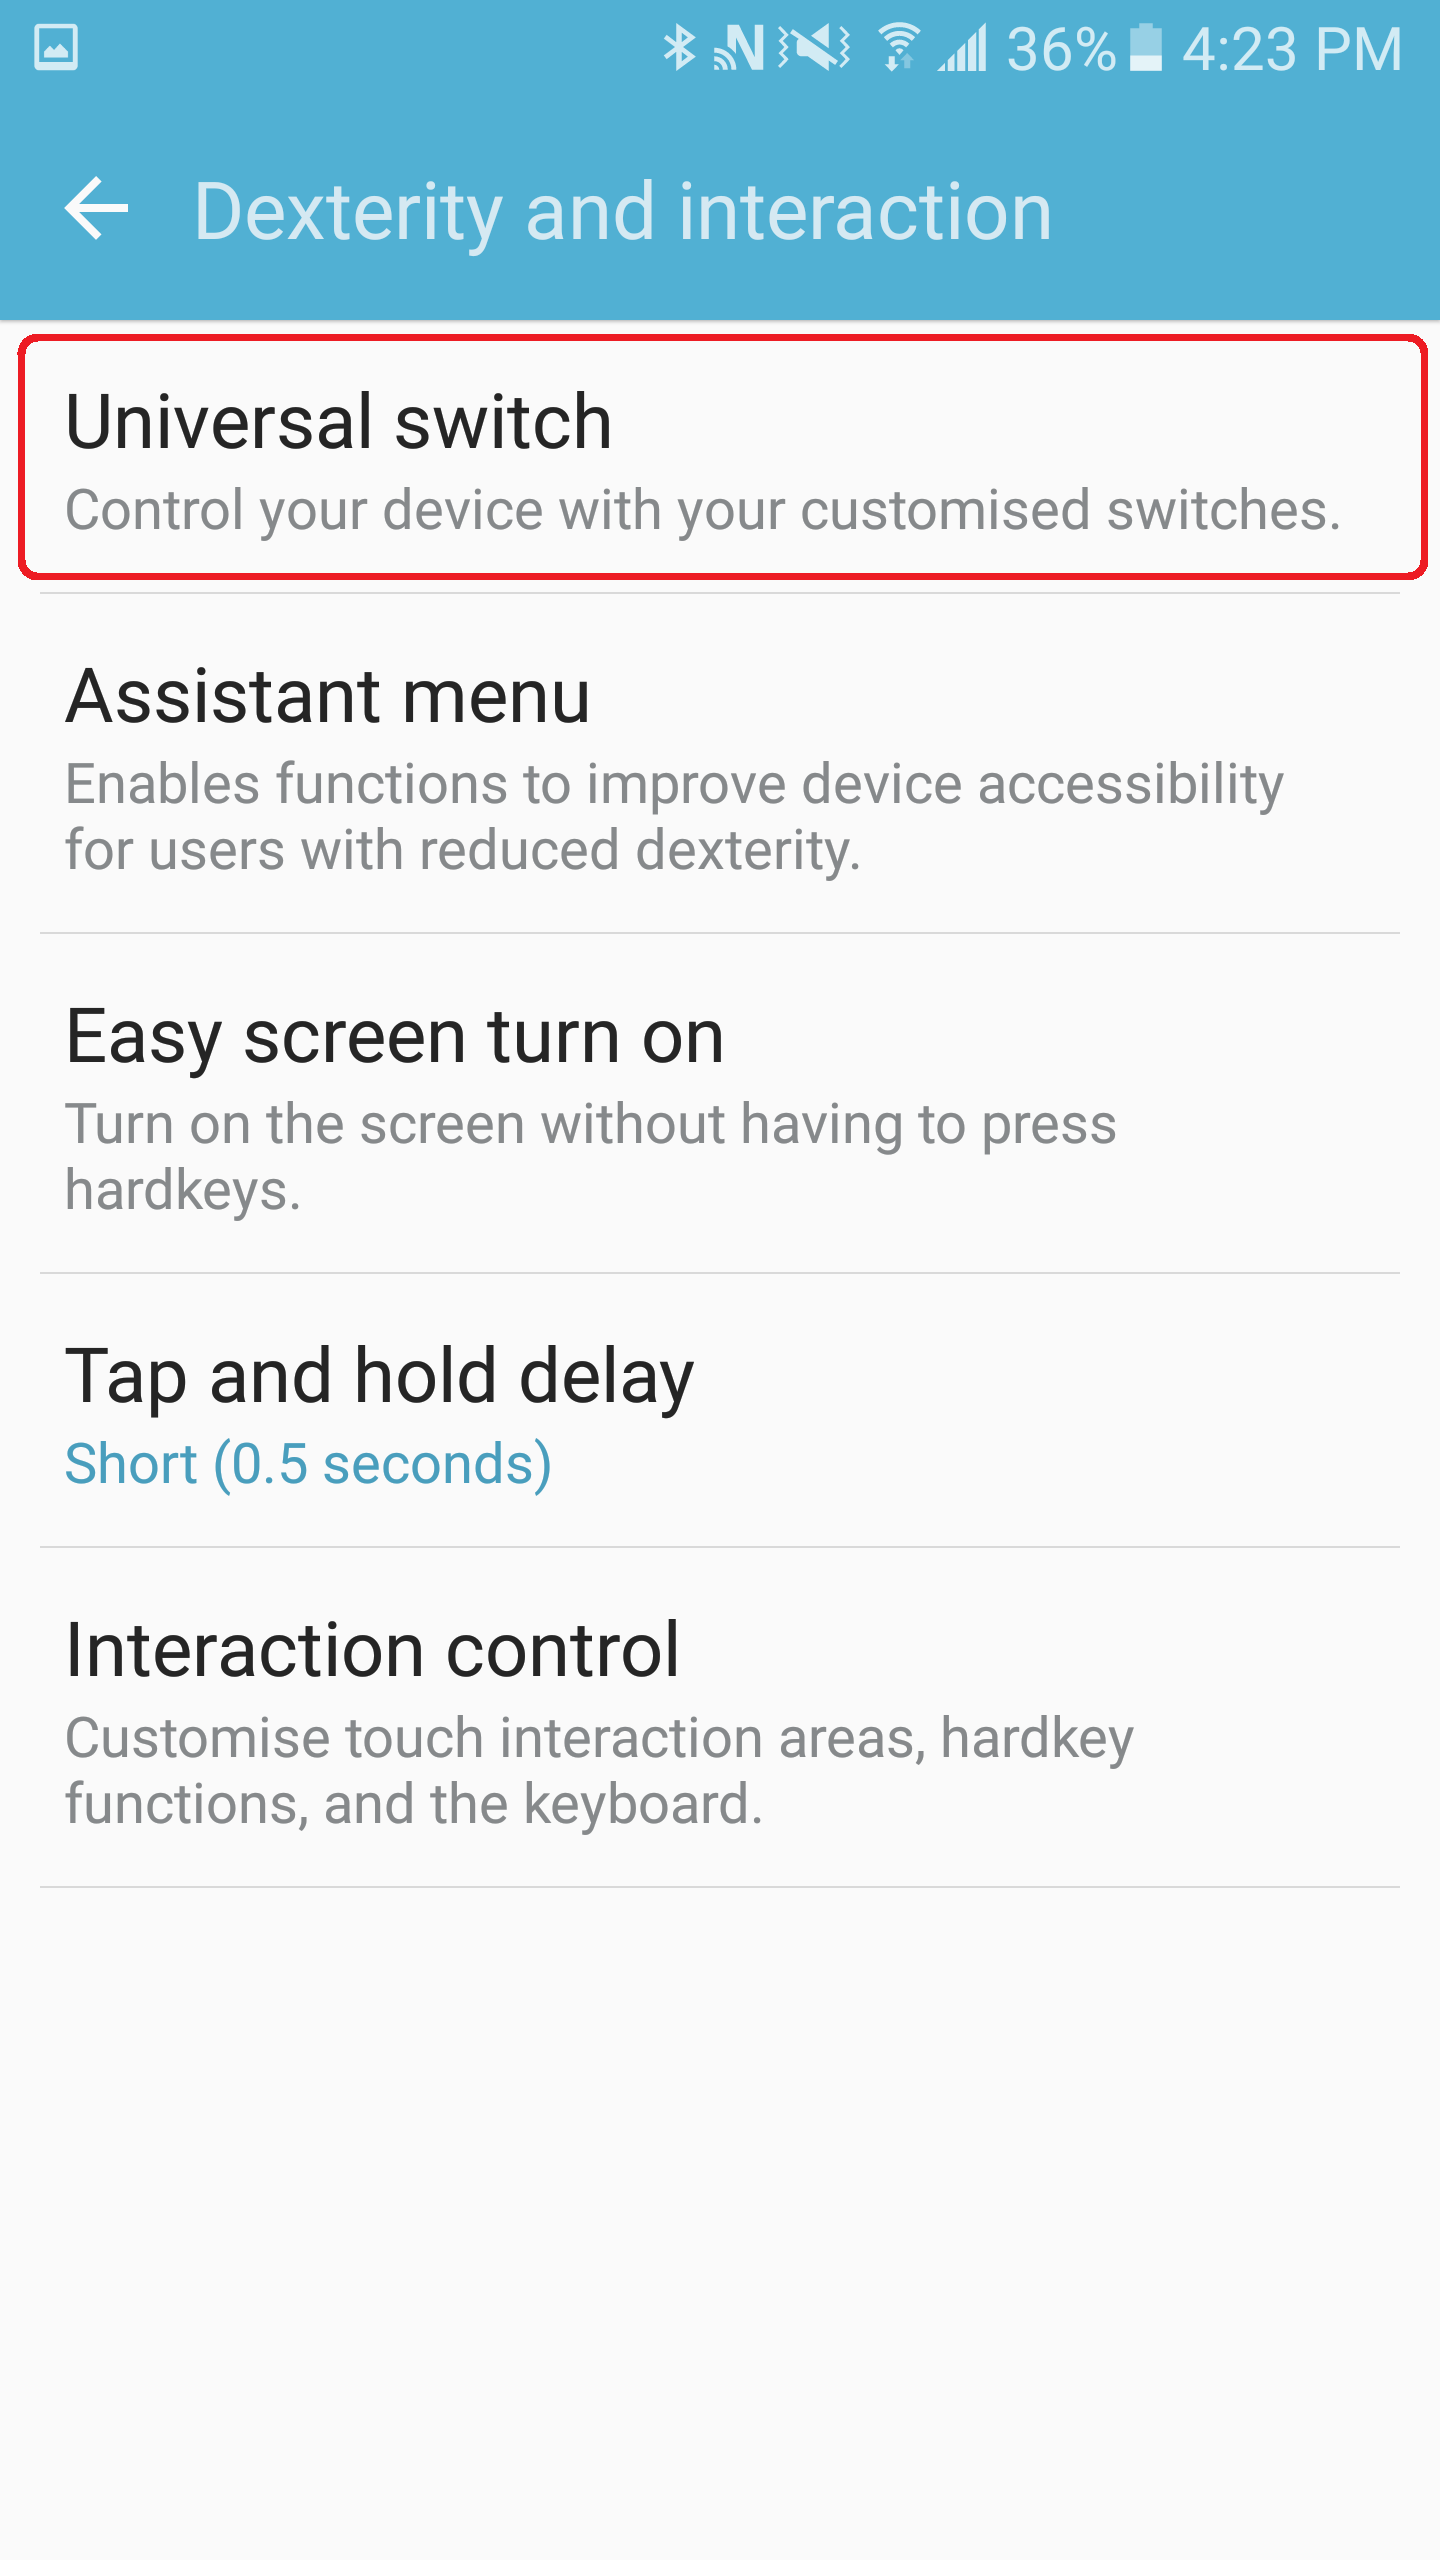
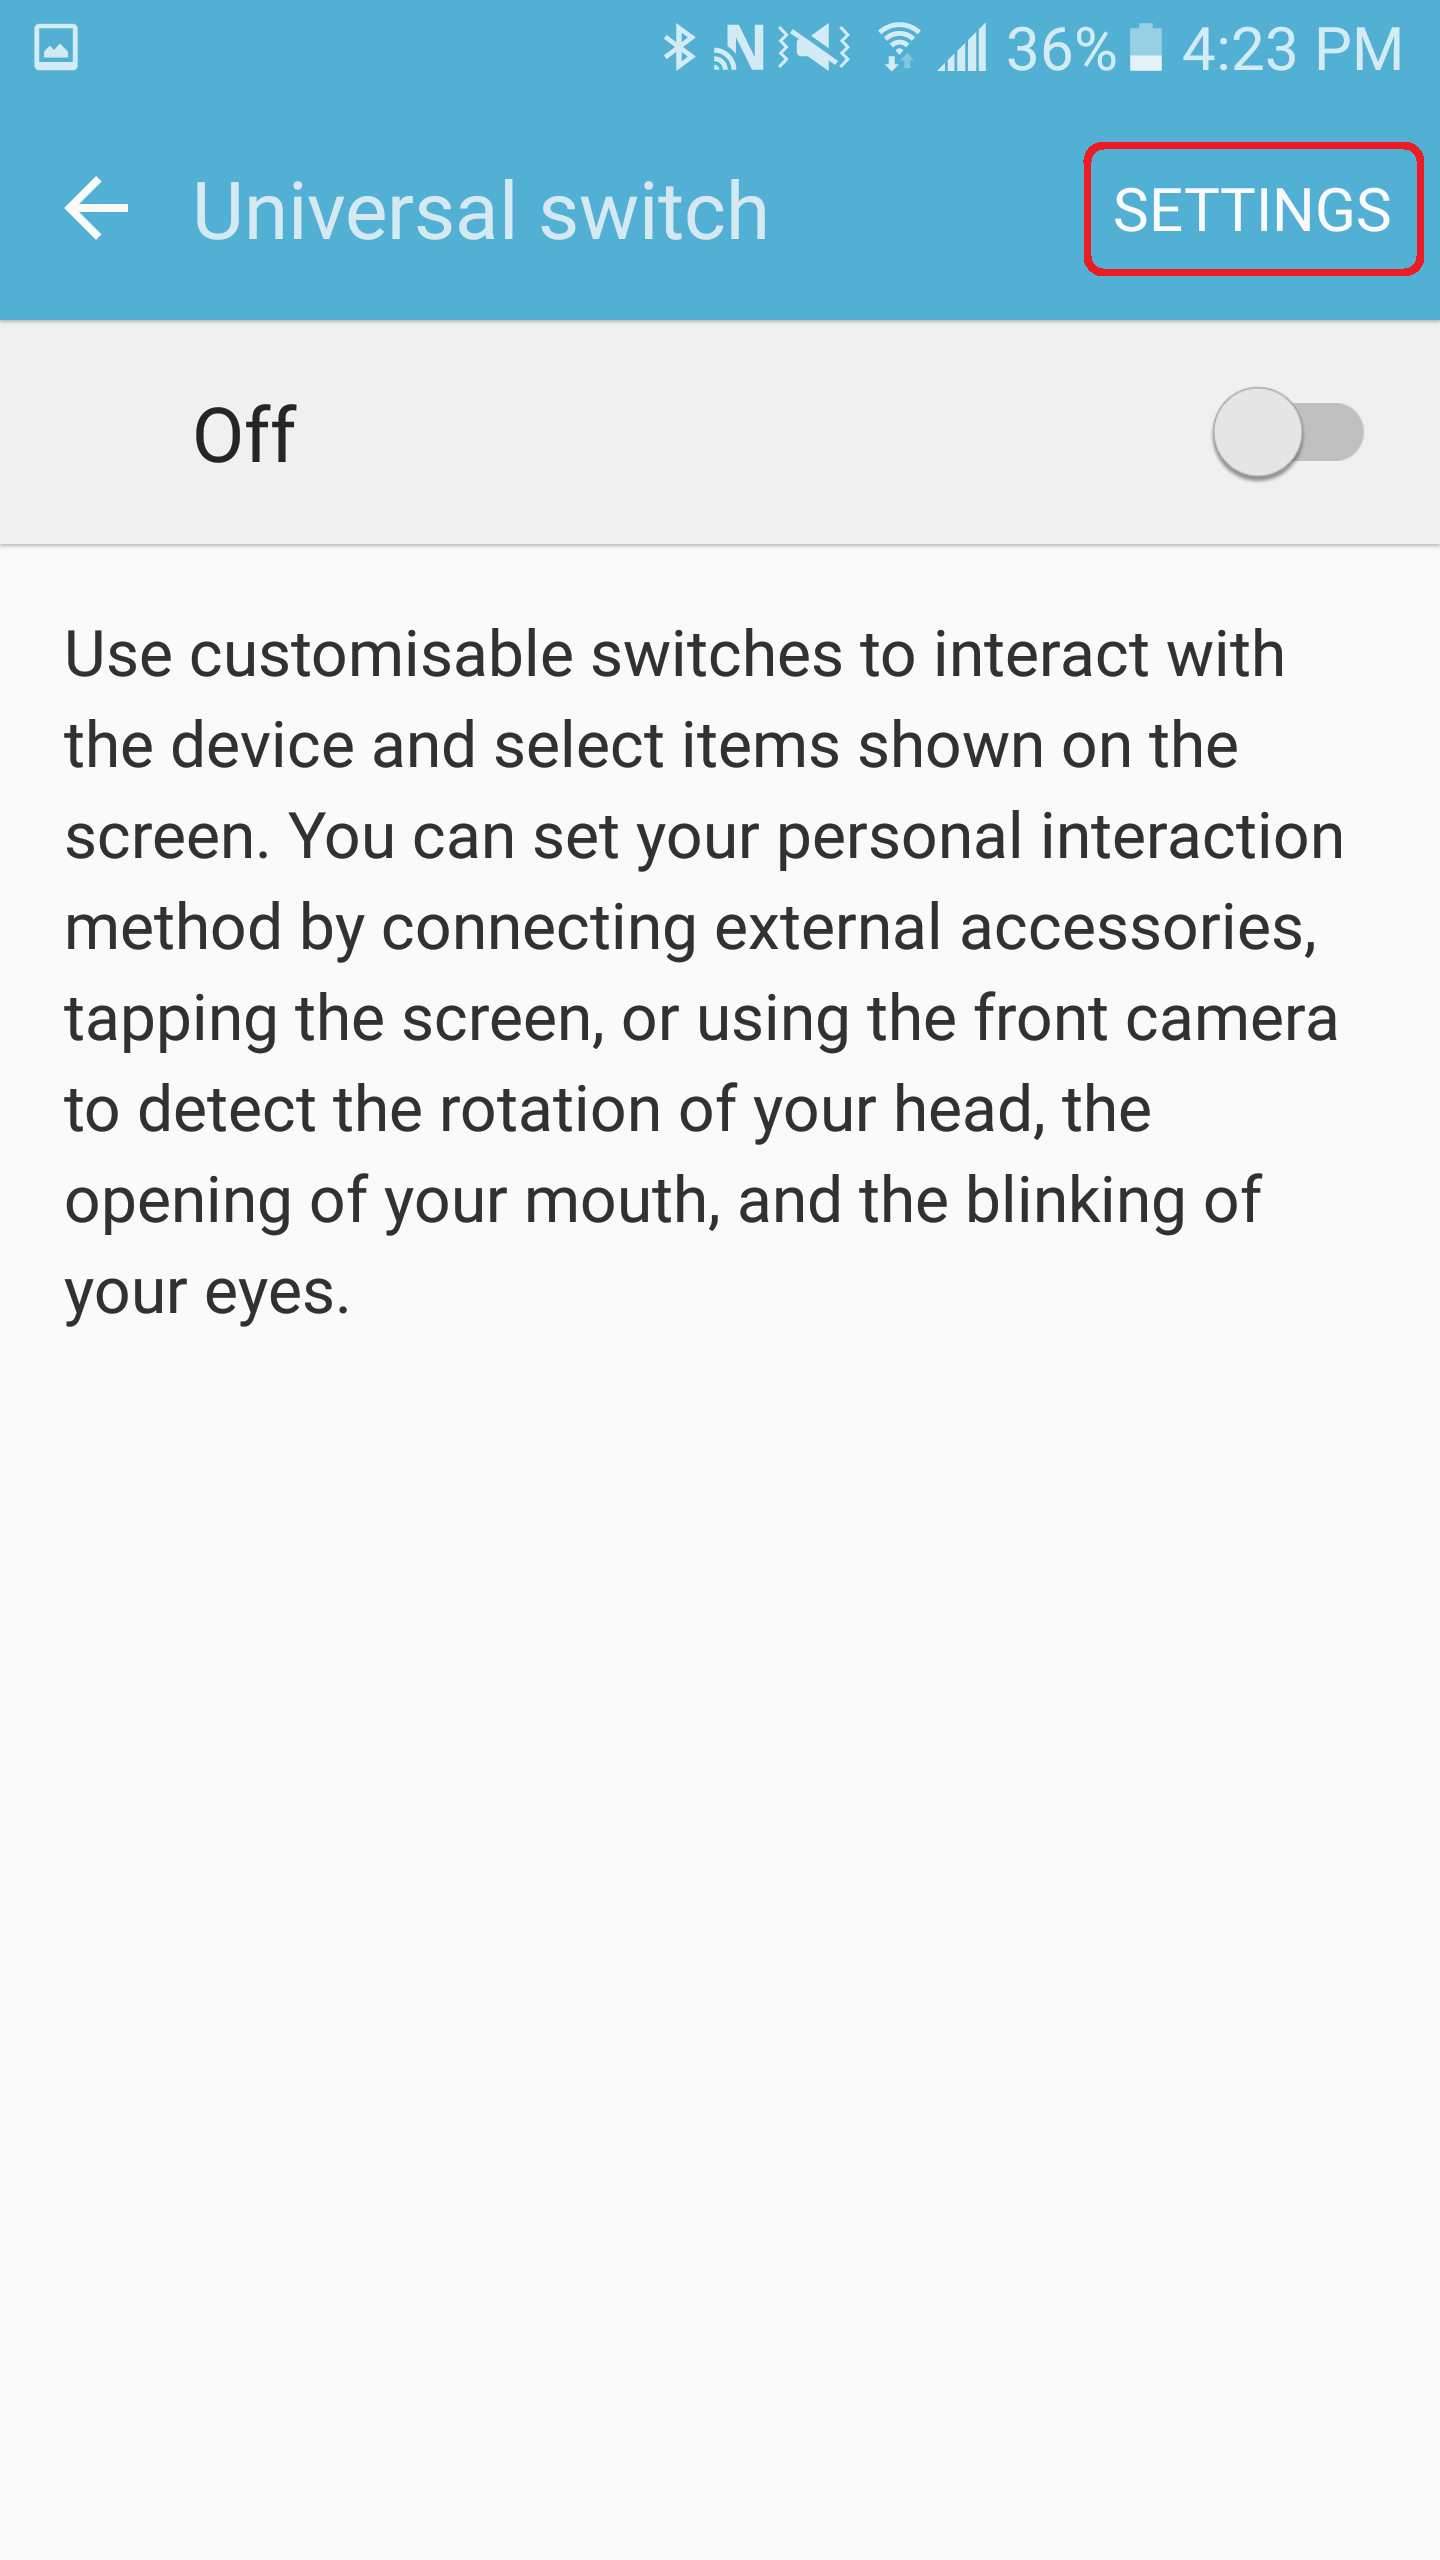
3. Set-up Universal Switch: Go to Settings > Accessibility, then select Dexterity and Interaction > Universal Switch. Click on Settings.
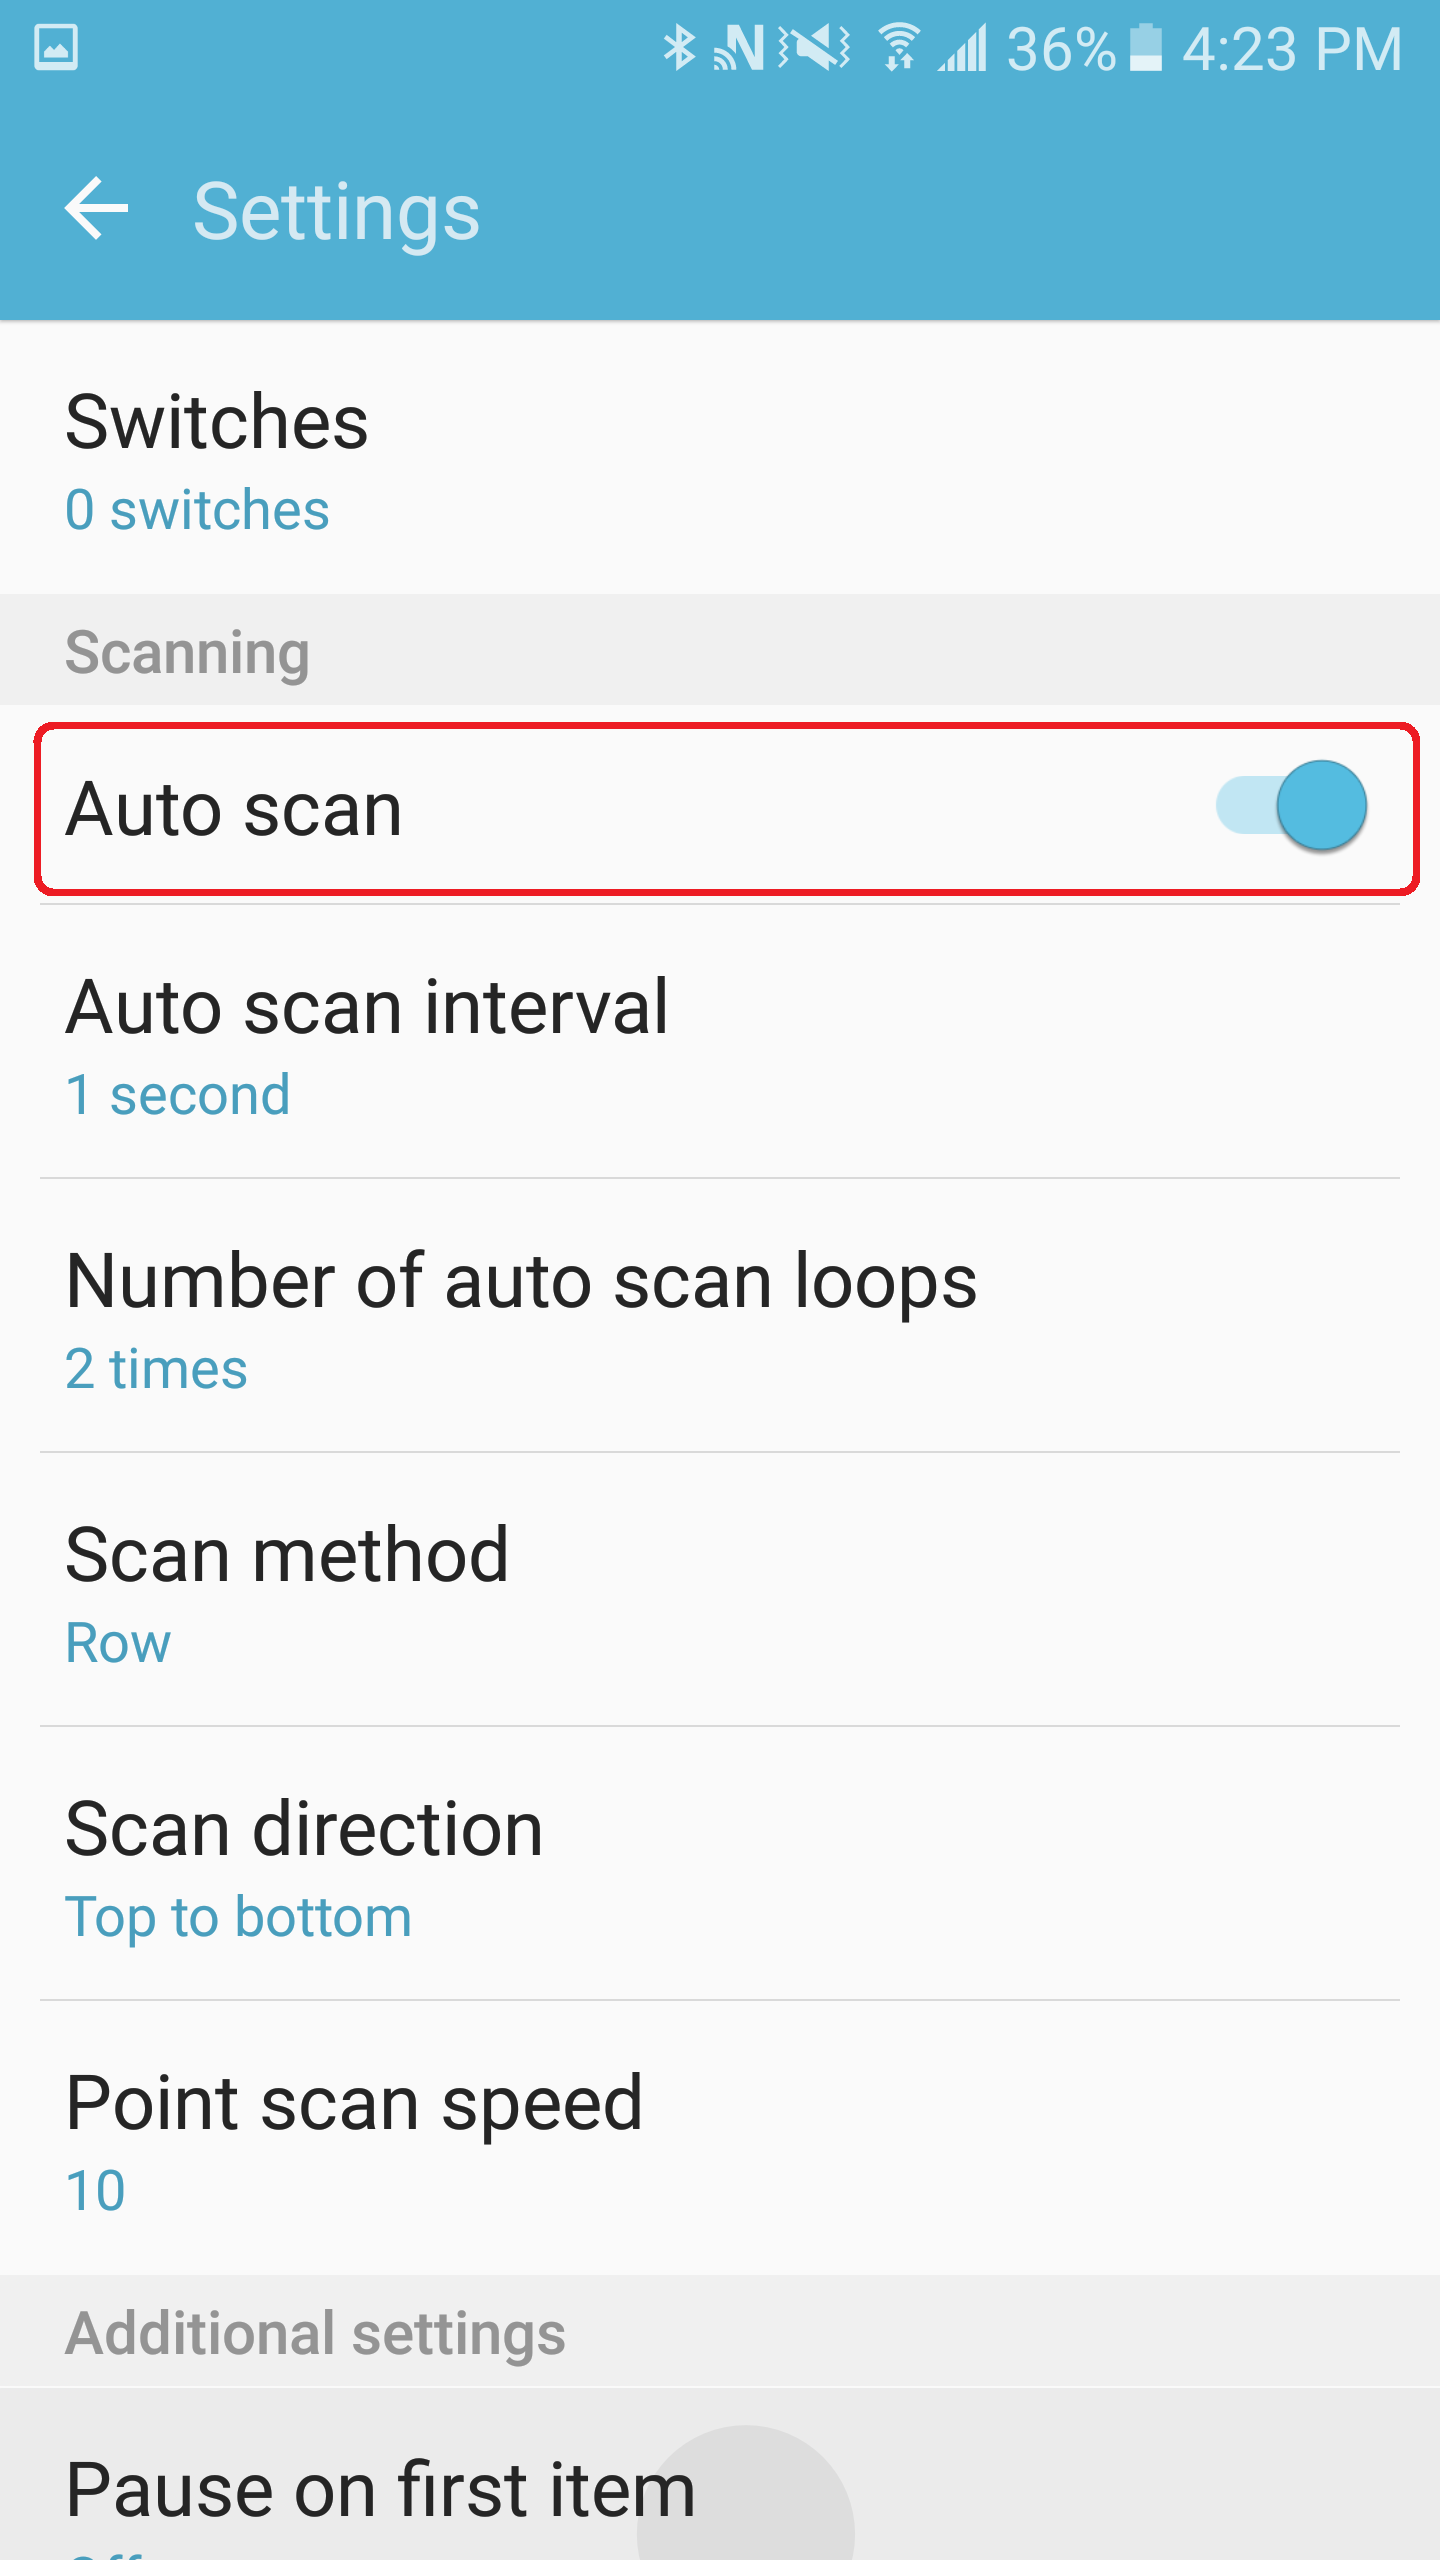
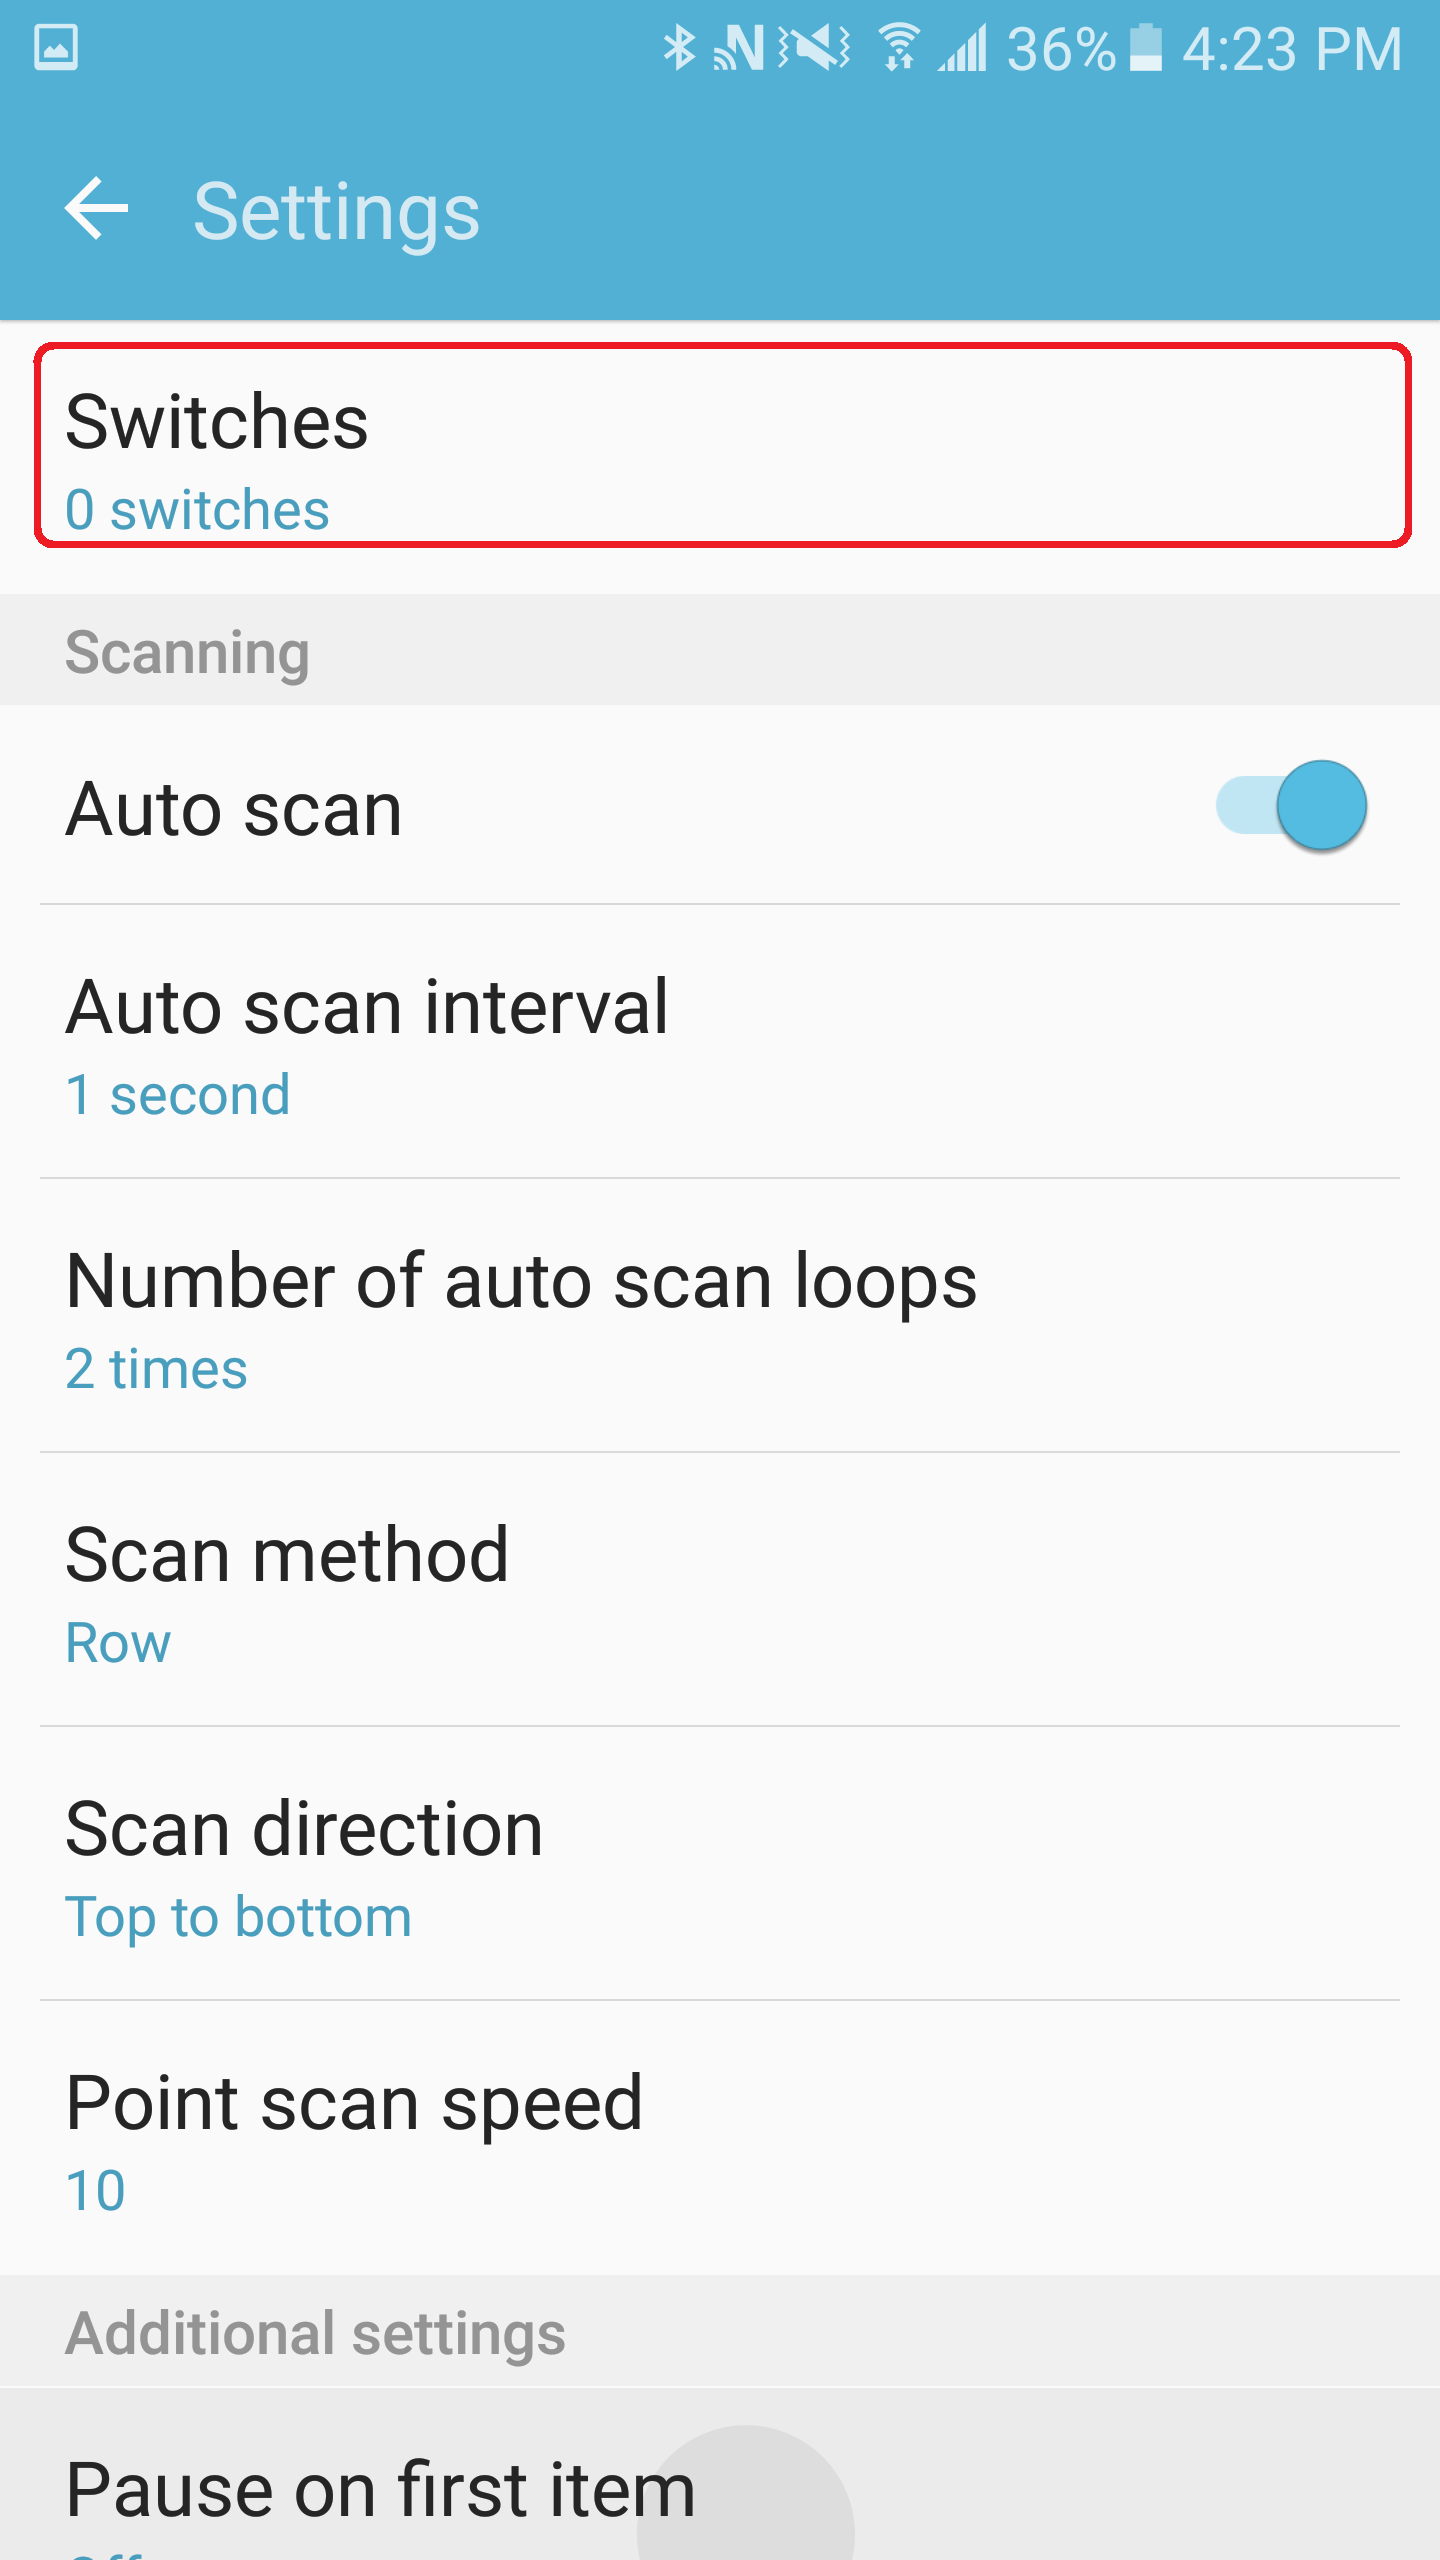
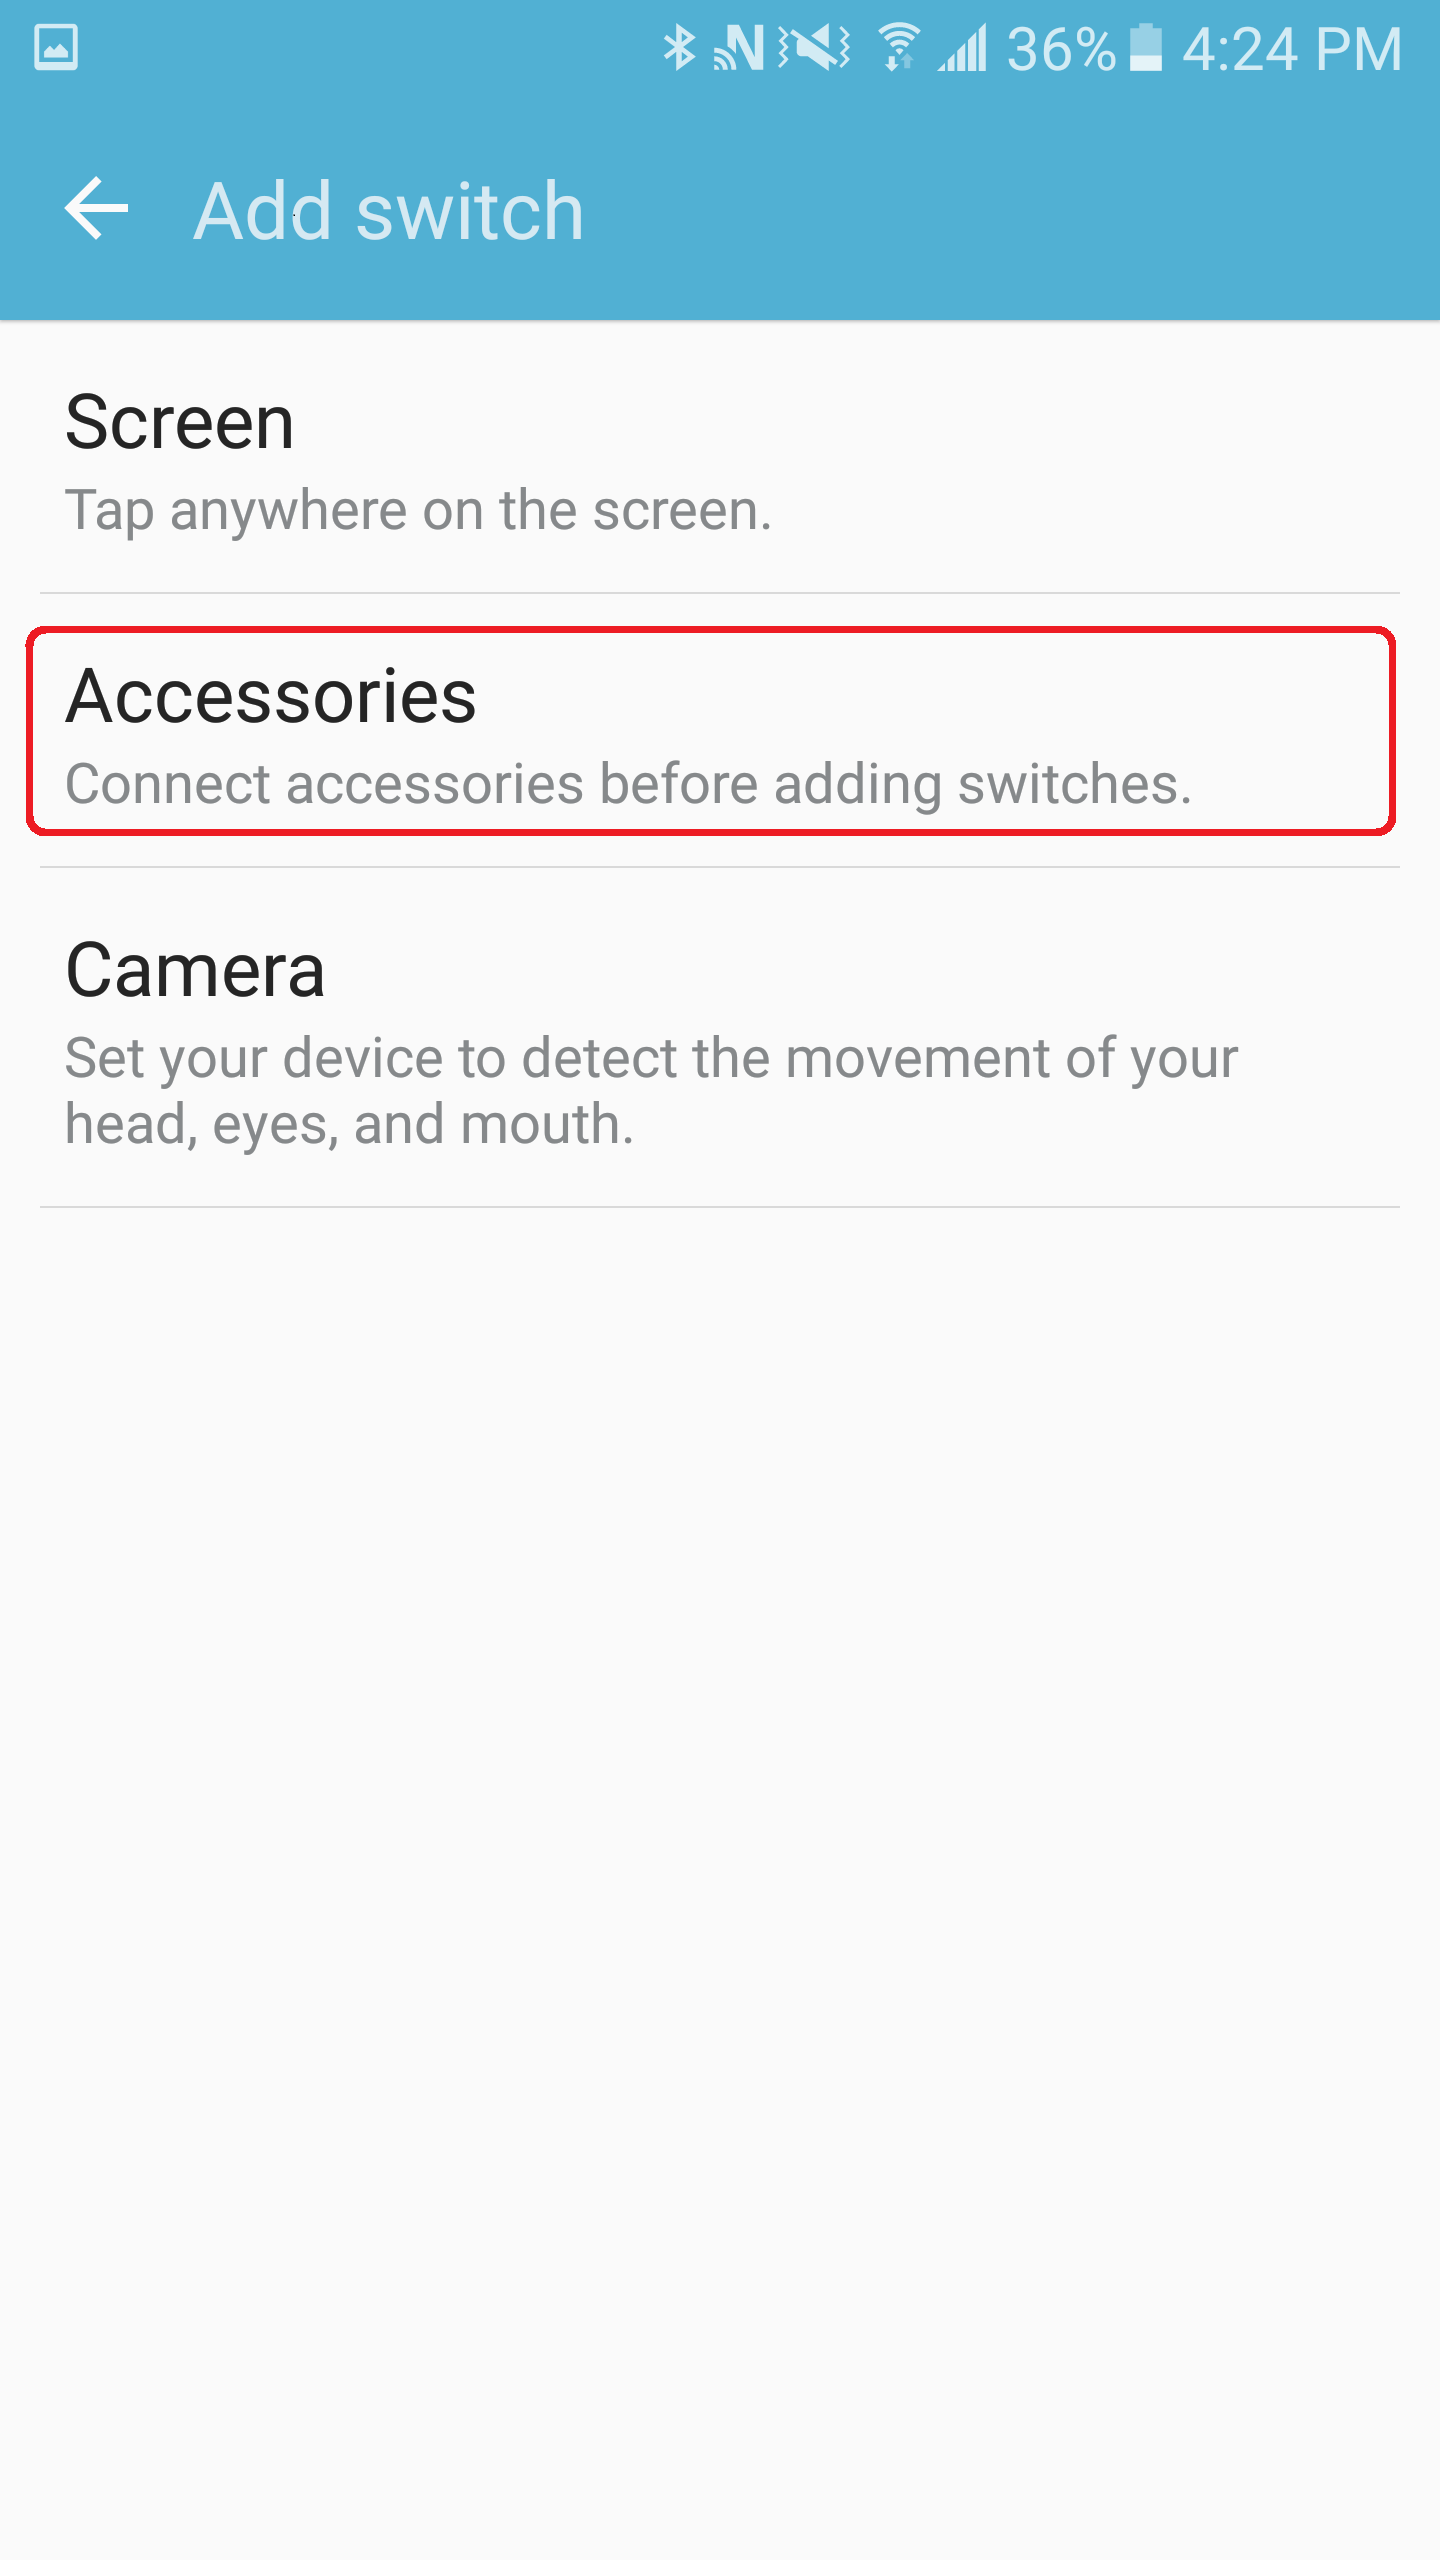
4. Assign your switches to actions: If you are using single-switch access, make sure Auto Scan is on. To set-up your switch Go to Switches > Add a Switch.
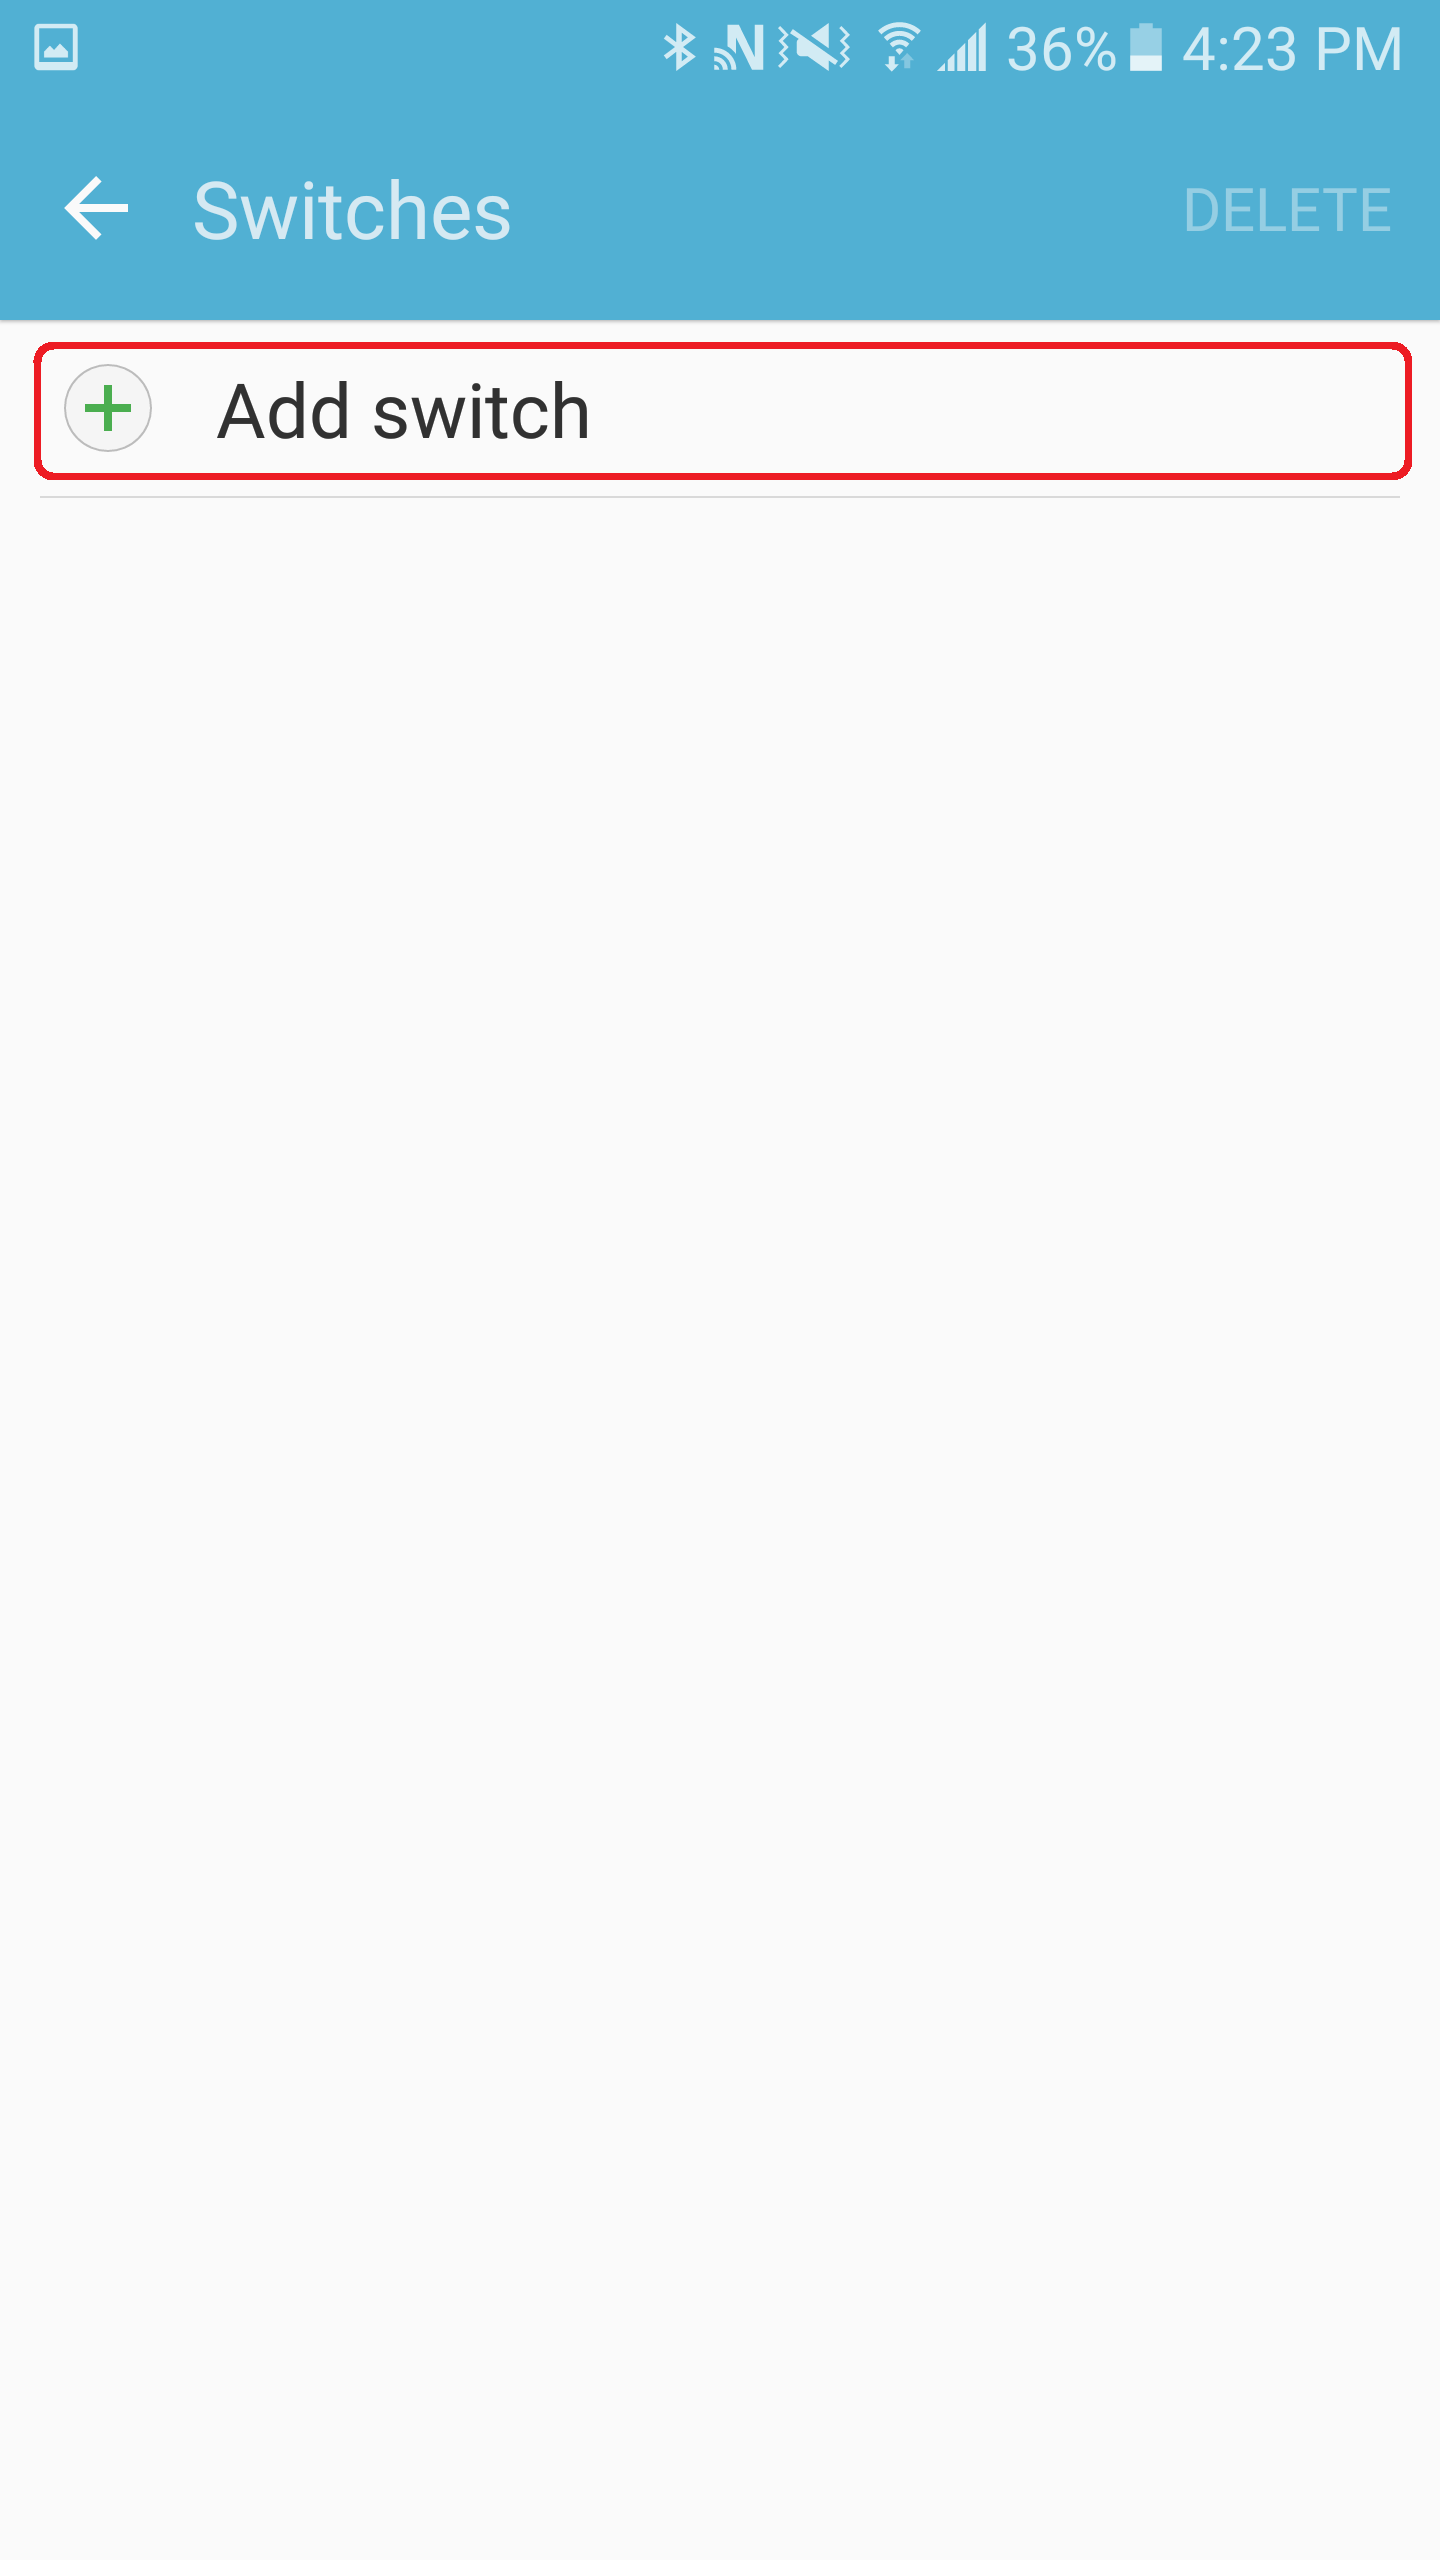
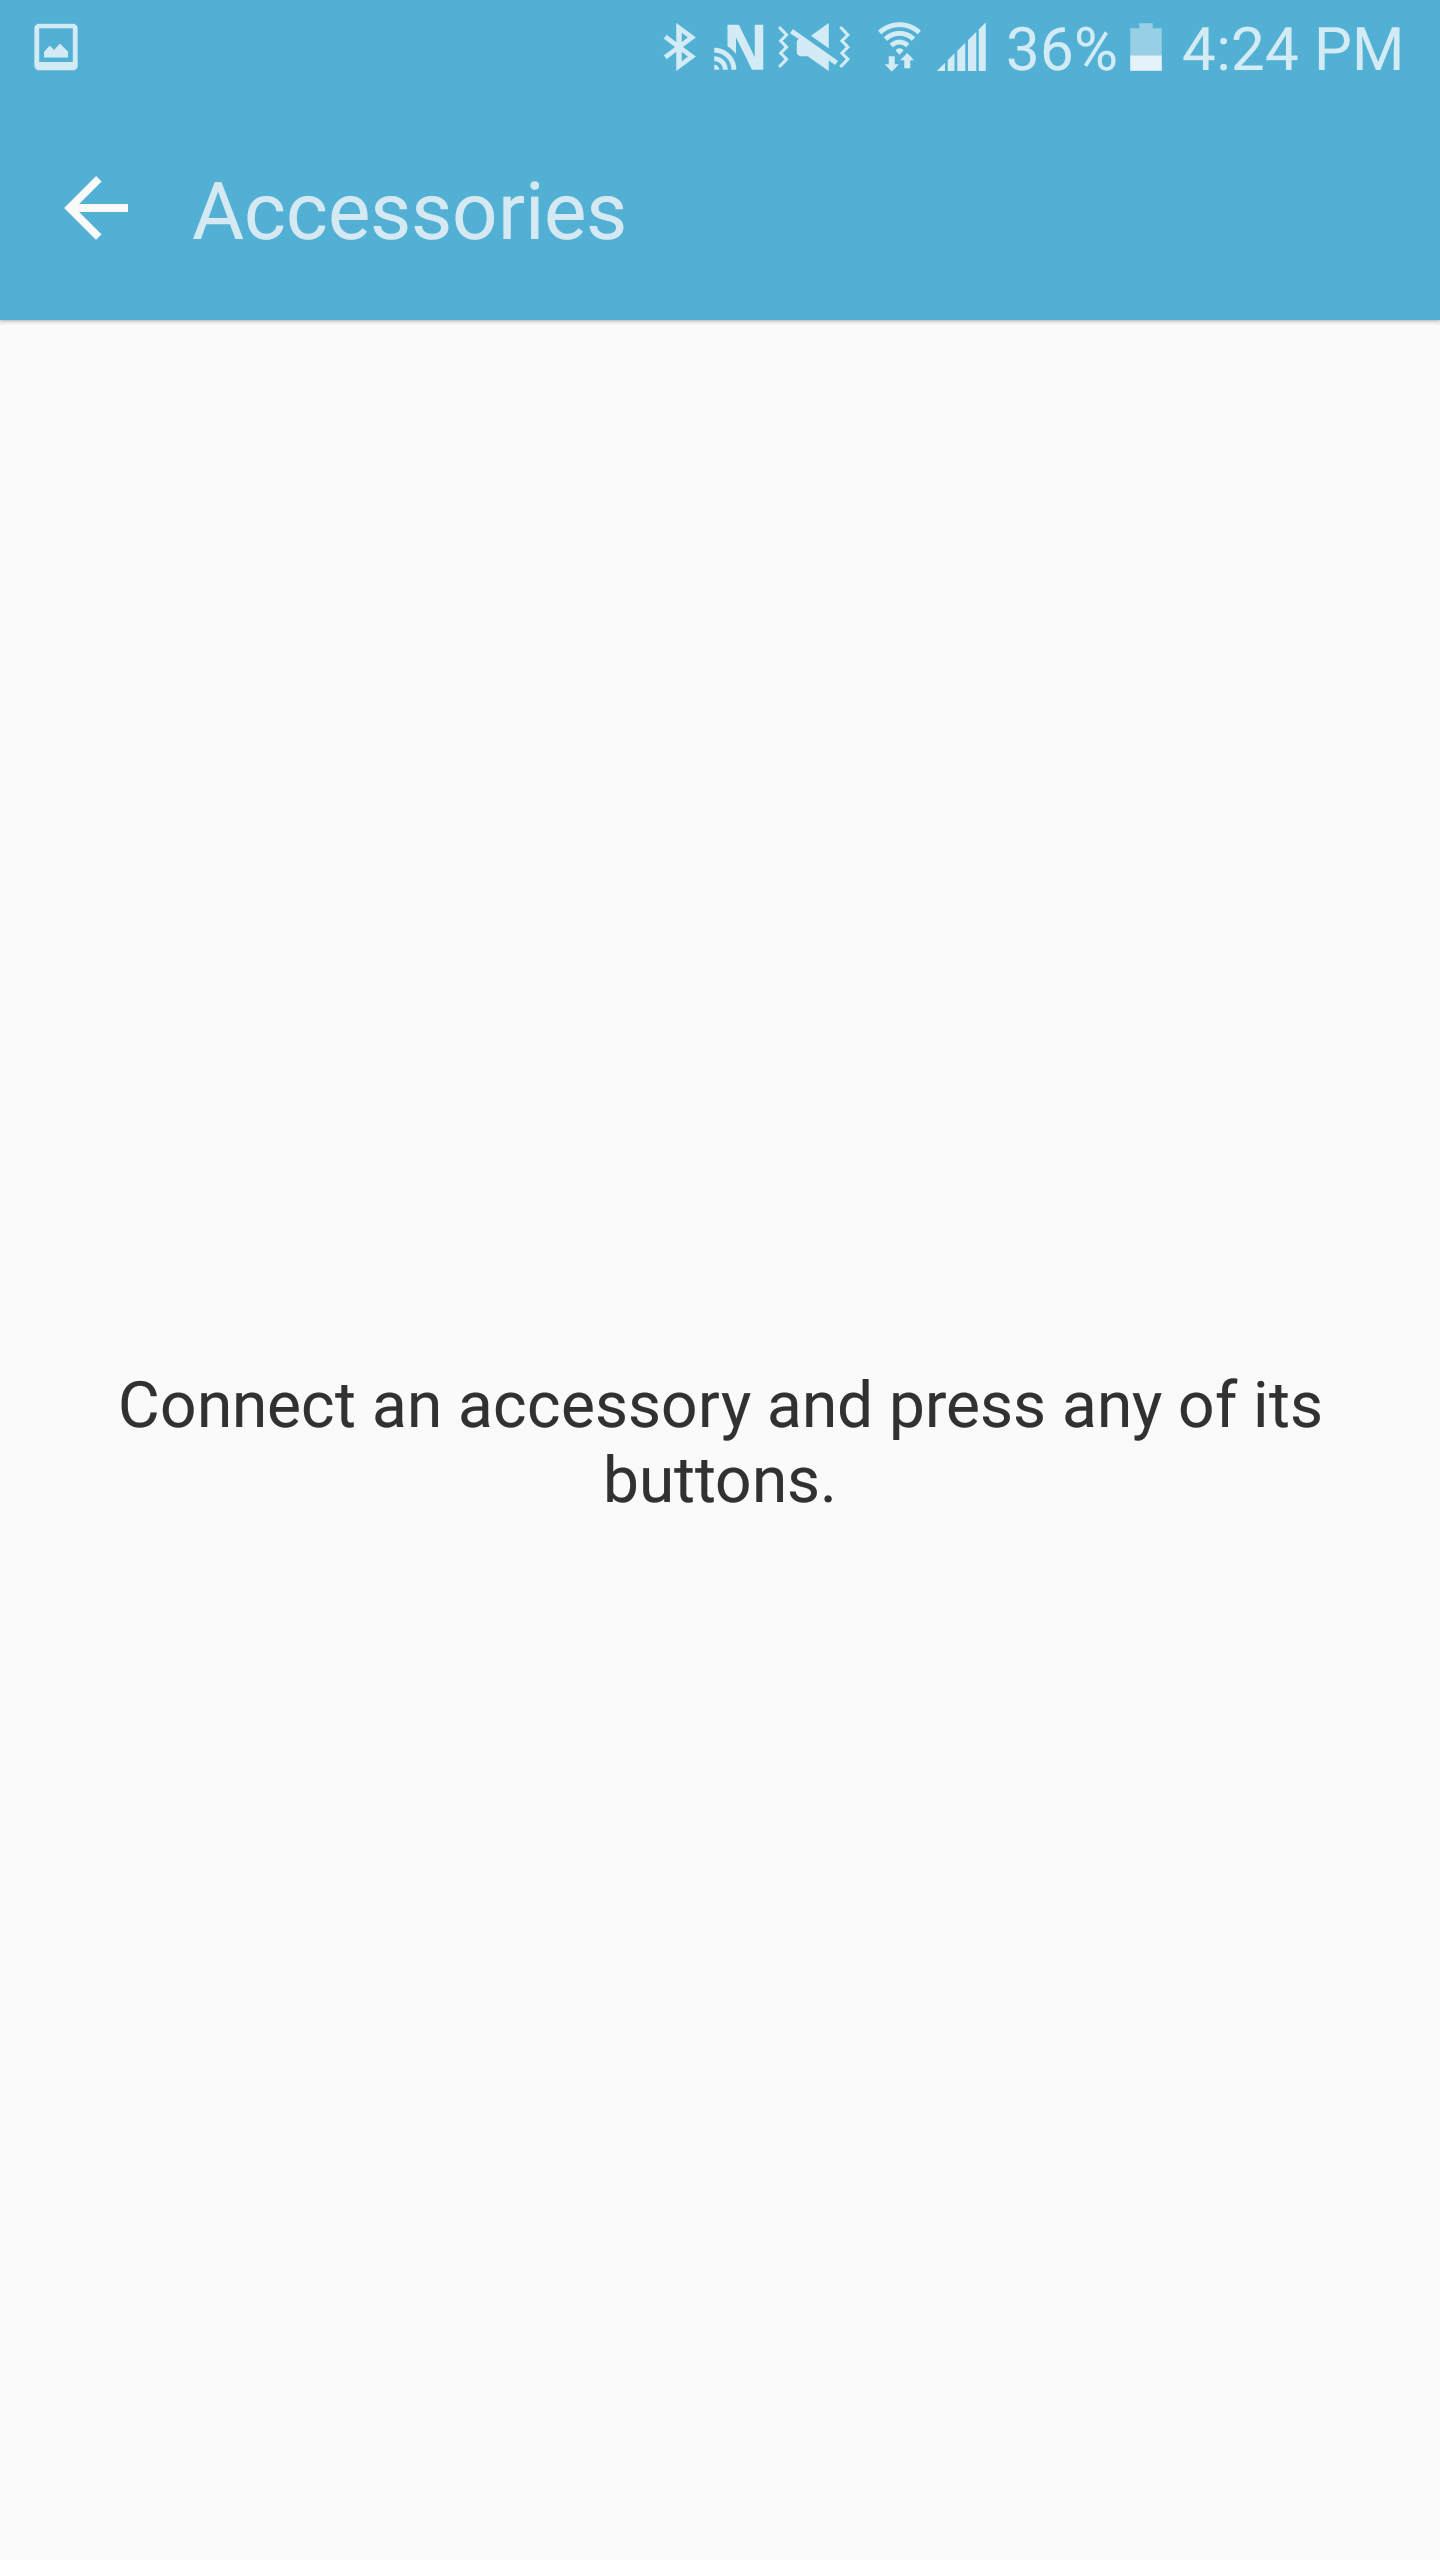
5. Select Accessories. You will be prompted to press your switch at this point. Press a switch connected to the Tecla Shield. In the New Switch pop-up window write the name of the switch and press Save.

6. If you are using a single switch (or you are using more than one switch, but this is your main selection switch), choose the “Select Item” action. Check the Note section below for a brief description of other possible switch actions that you can assign to switches. The Recommended Configurations (table 1 & 2) may also be helpful for assigning switch actions.
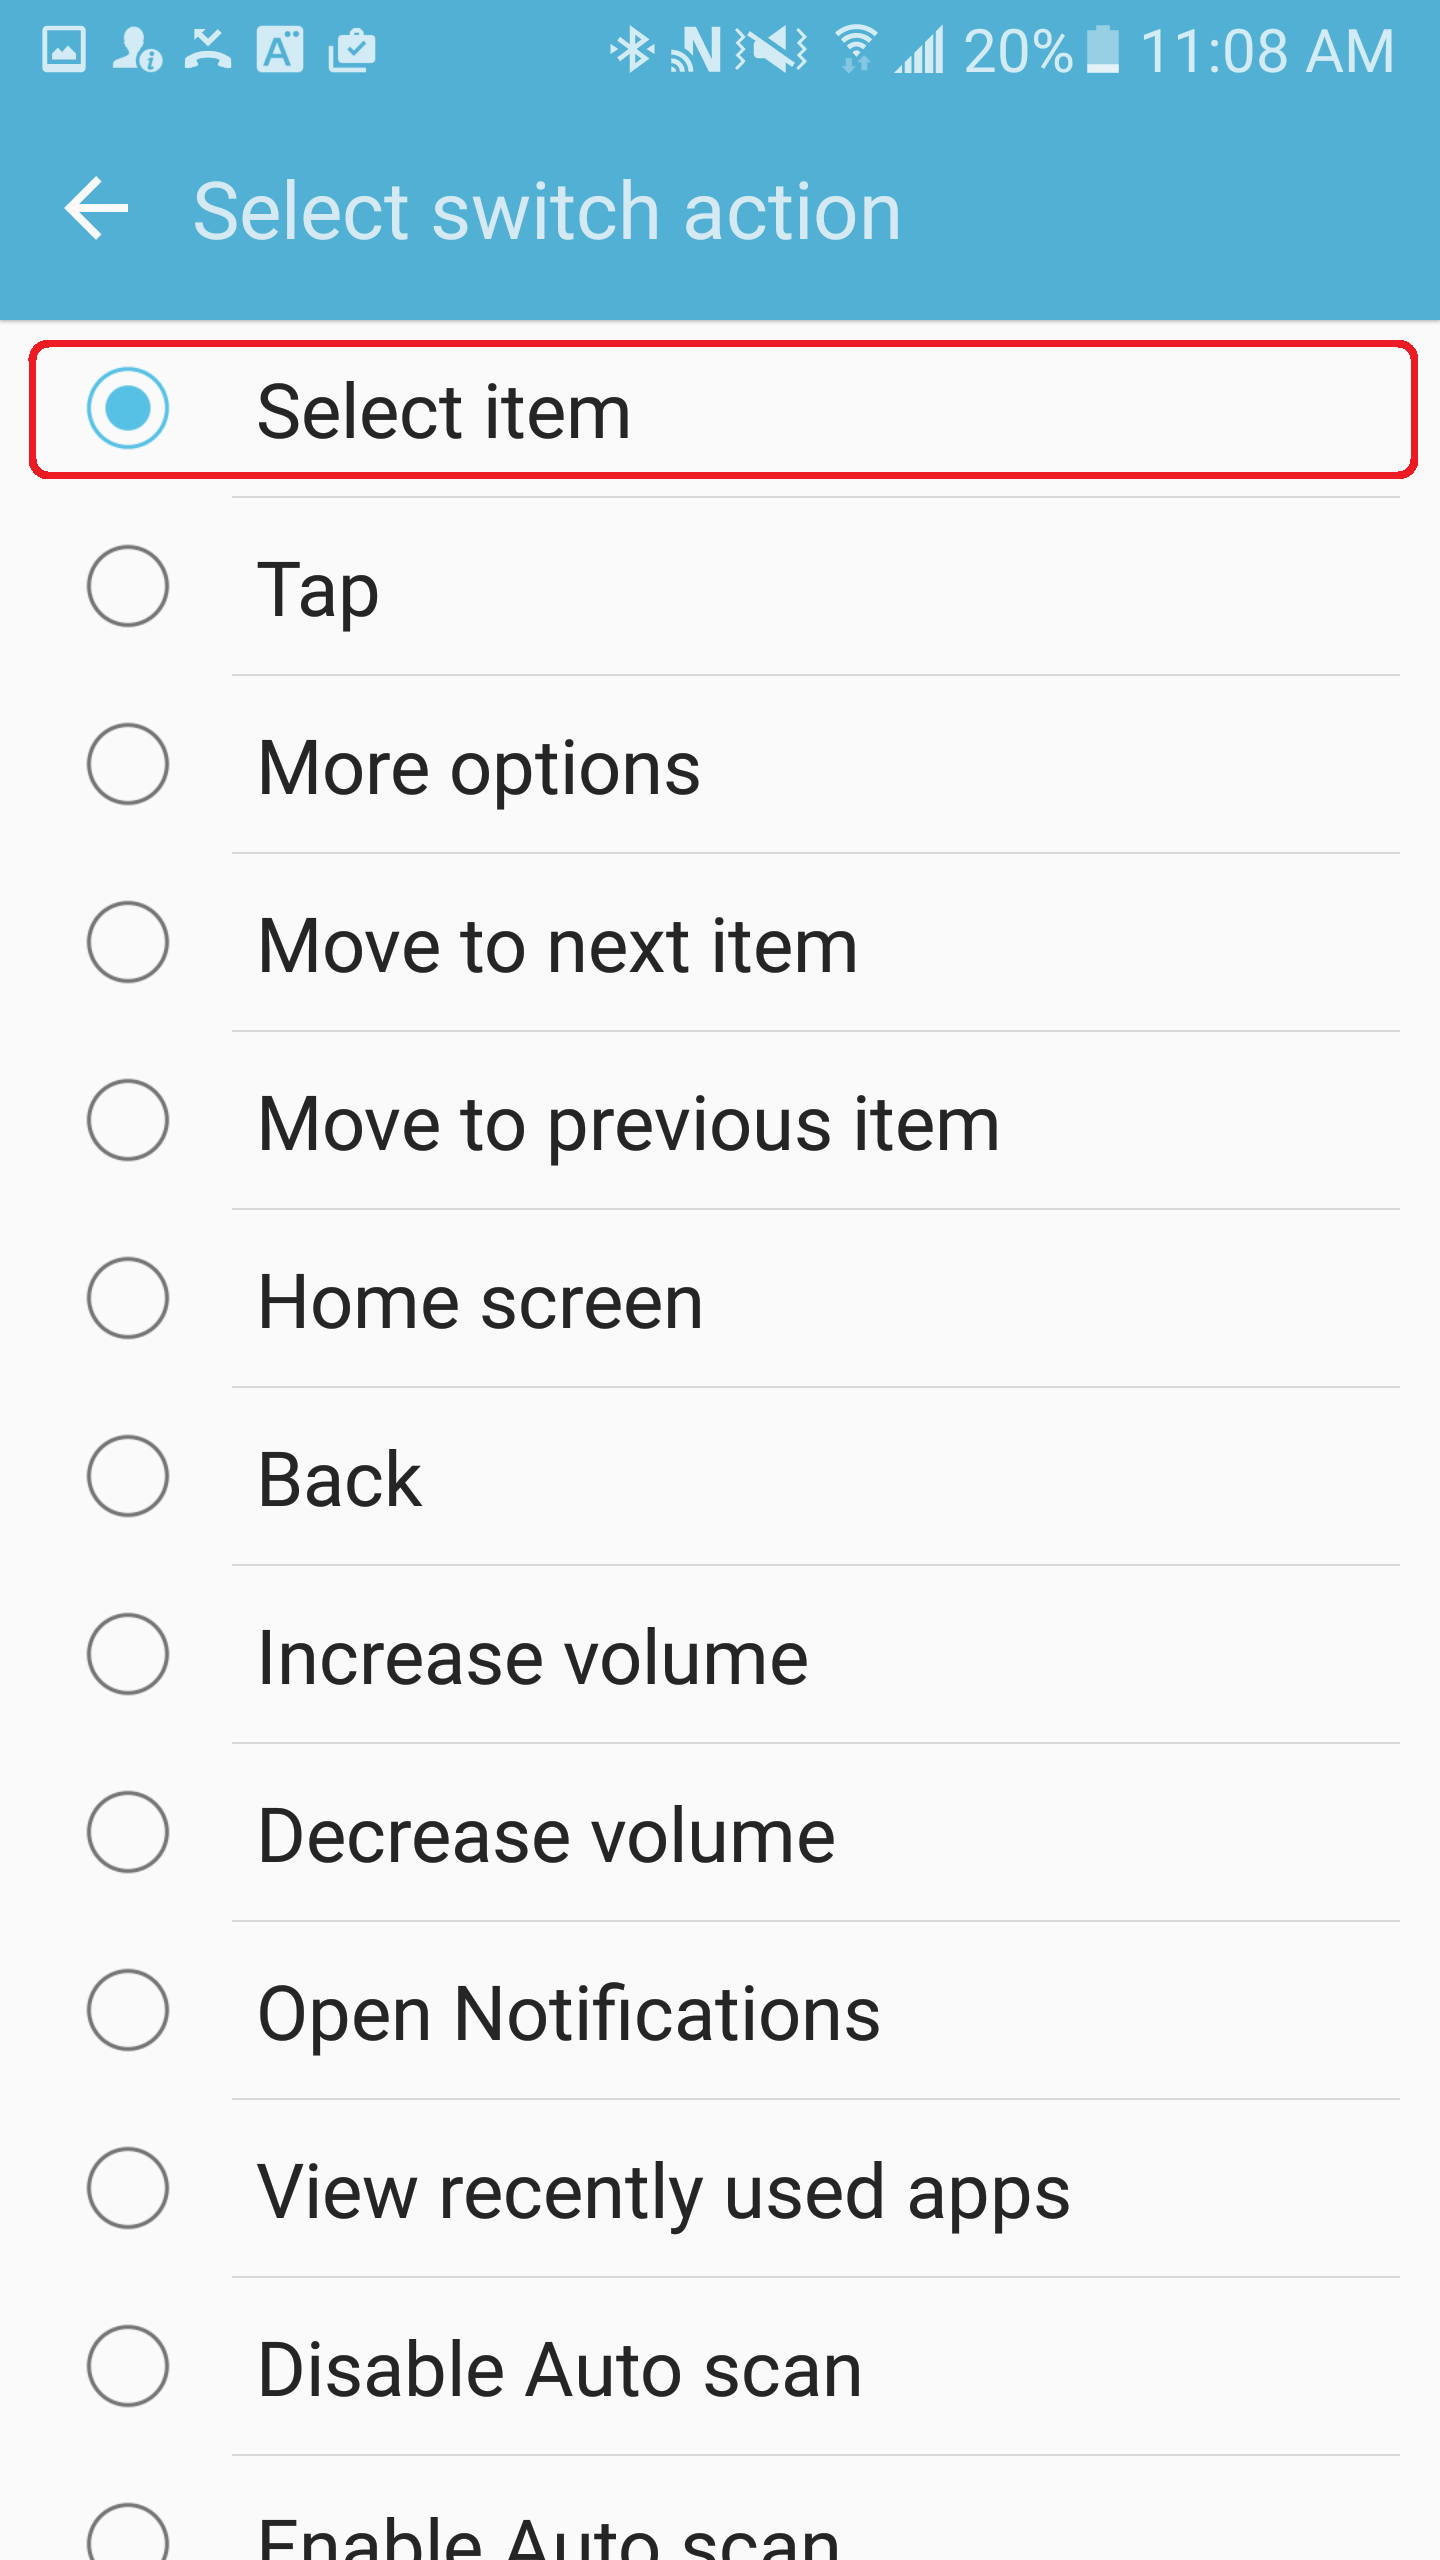

7. Repeat steps 4-6 for all your switches. For possible combinations check the Recommended Configuration section below.
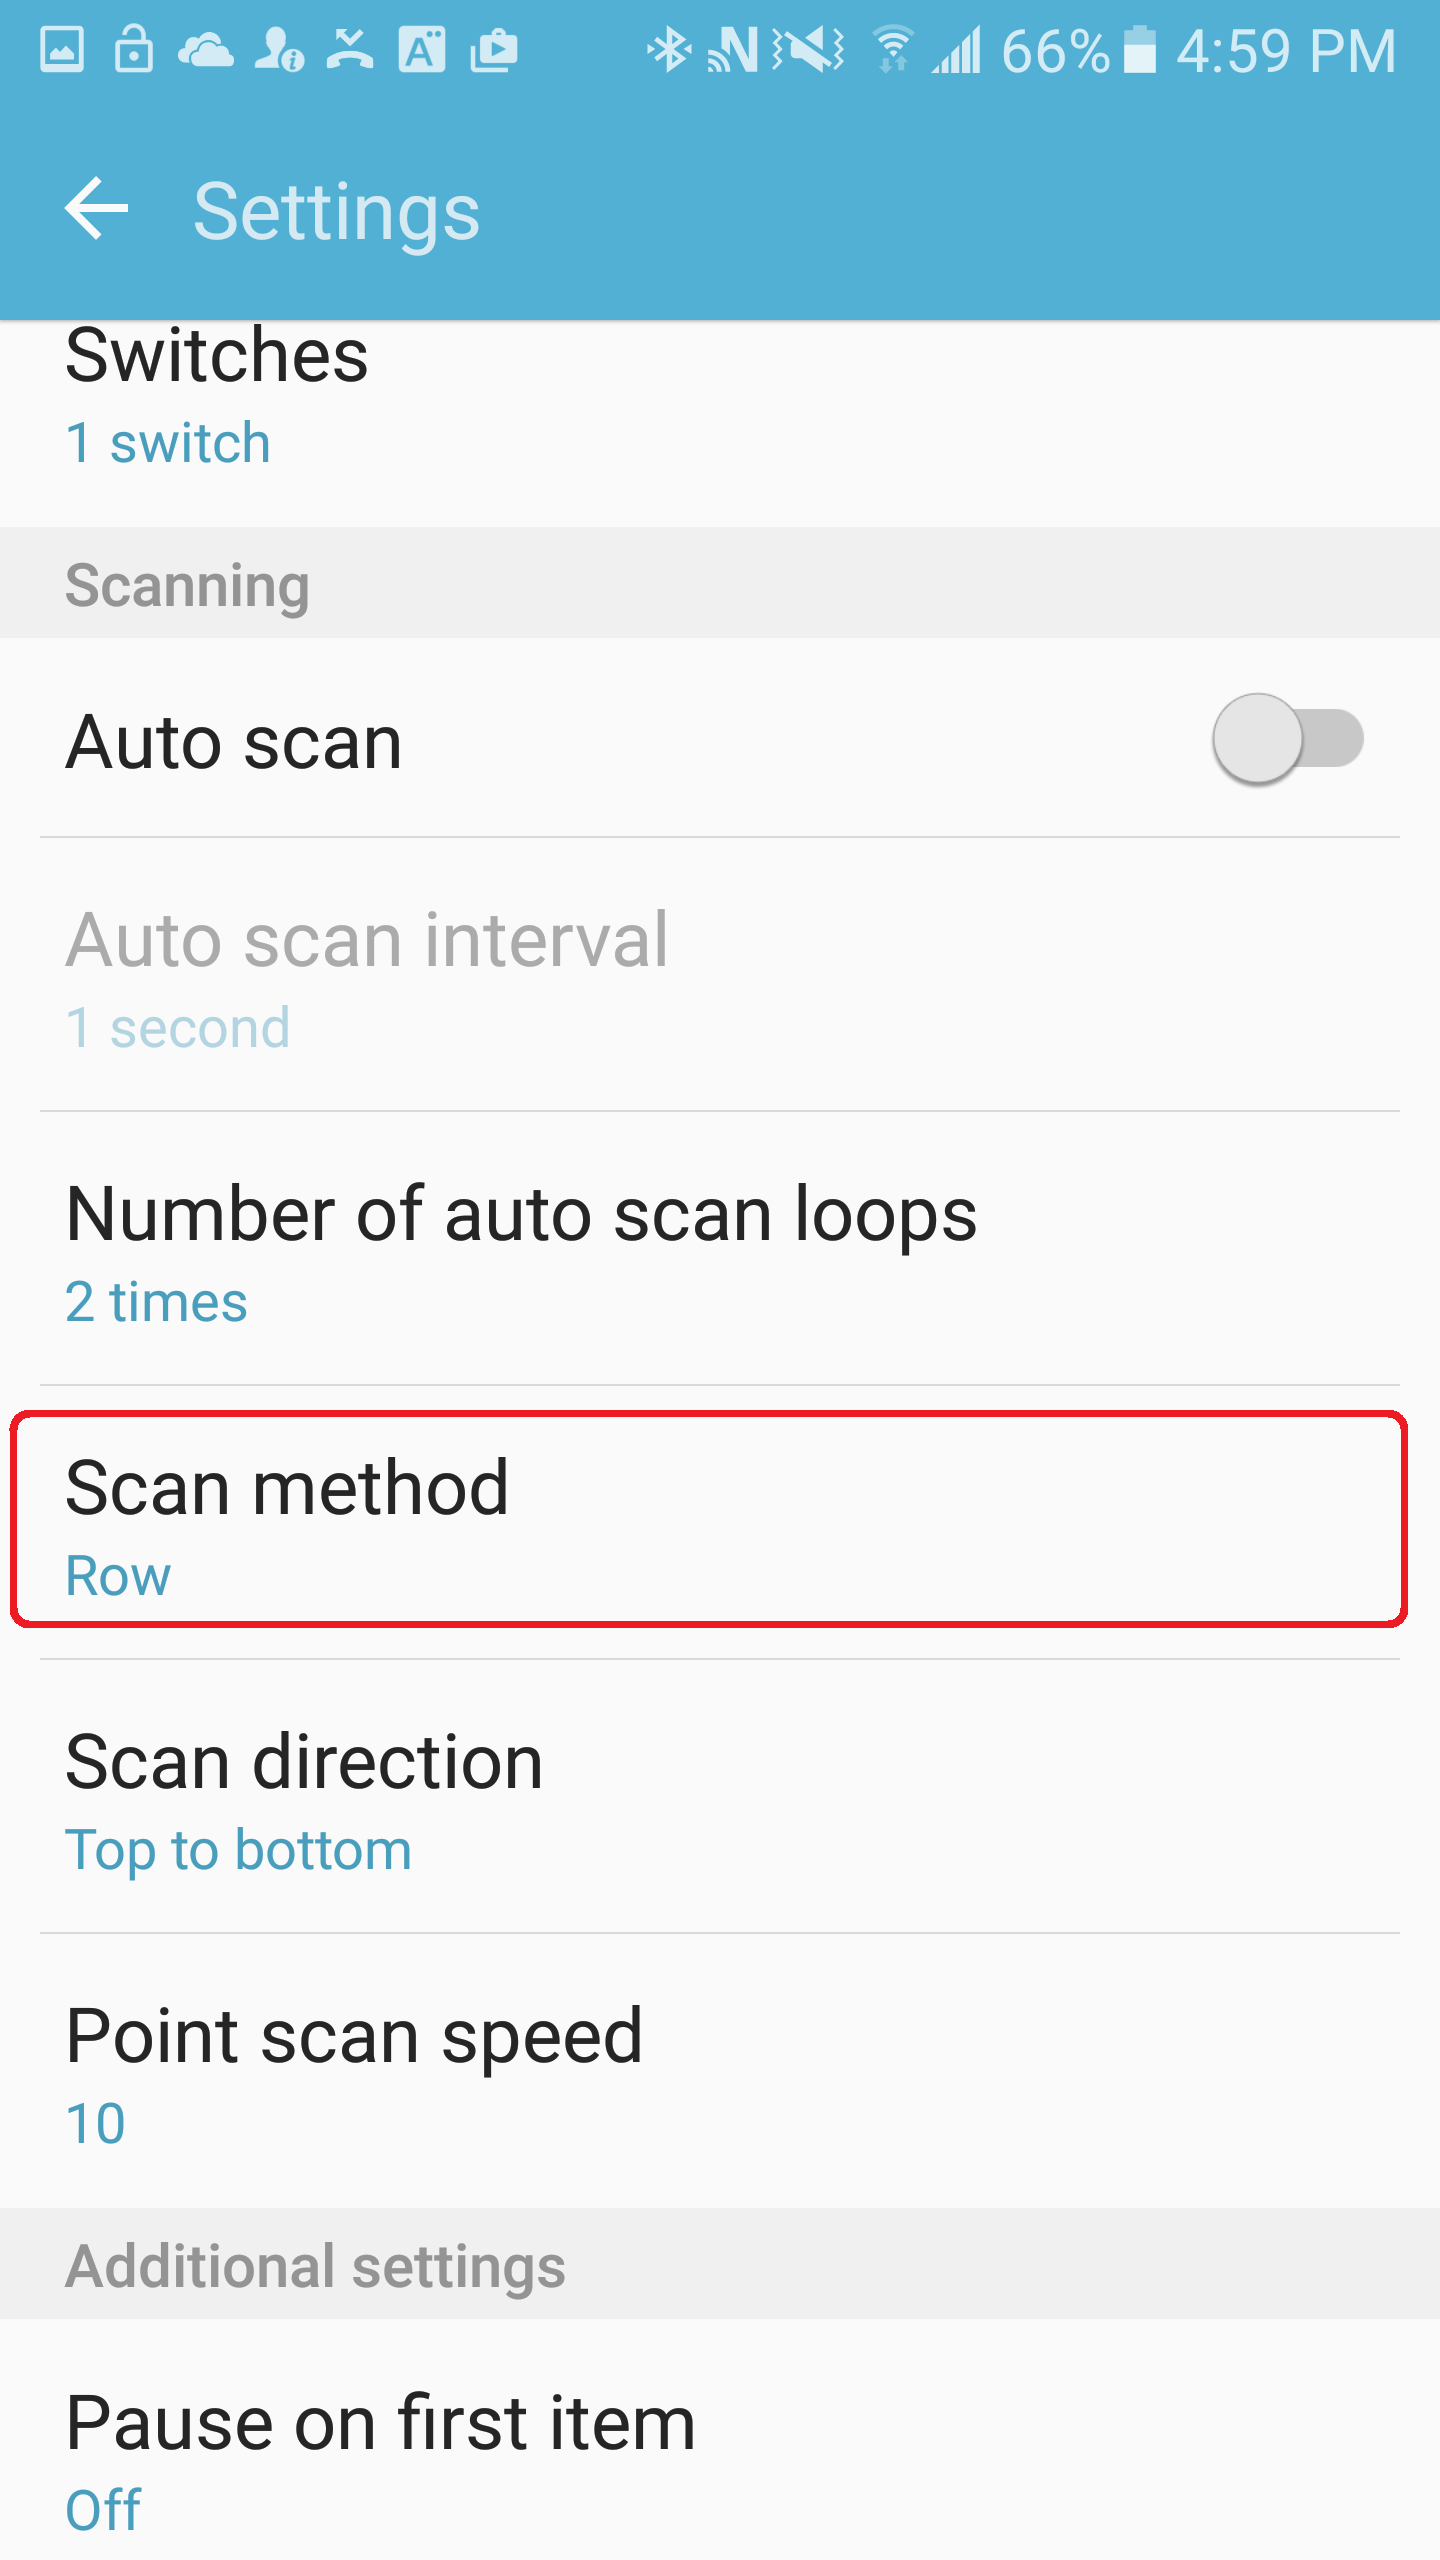
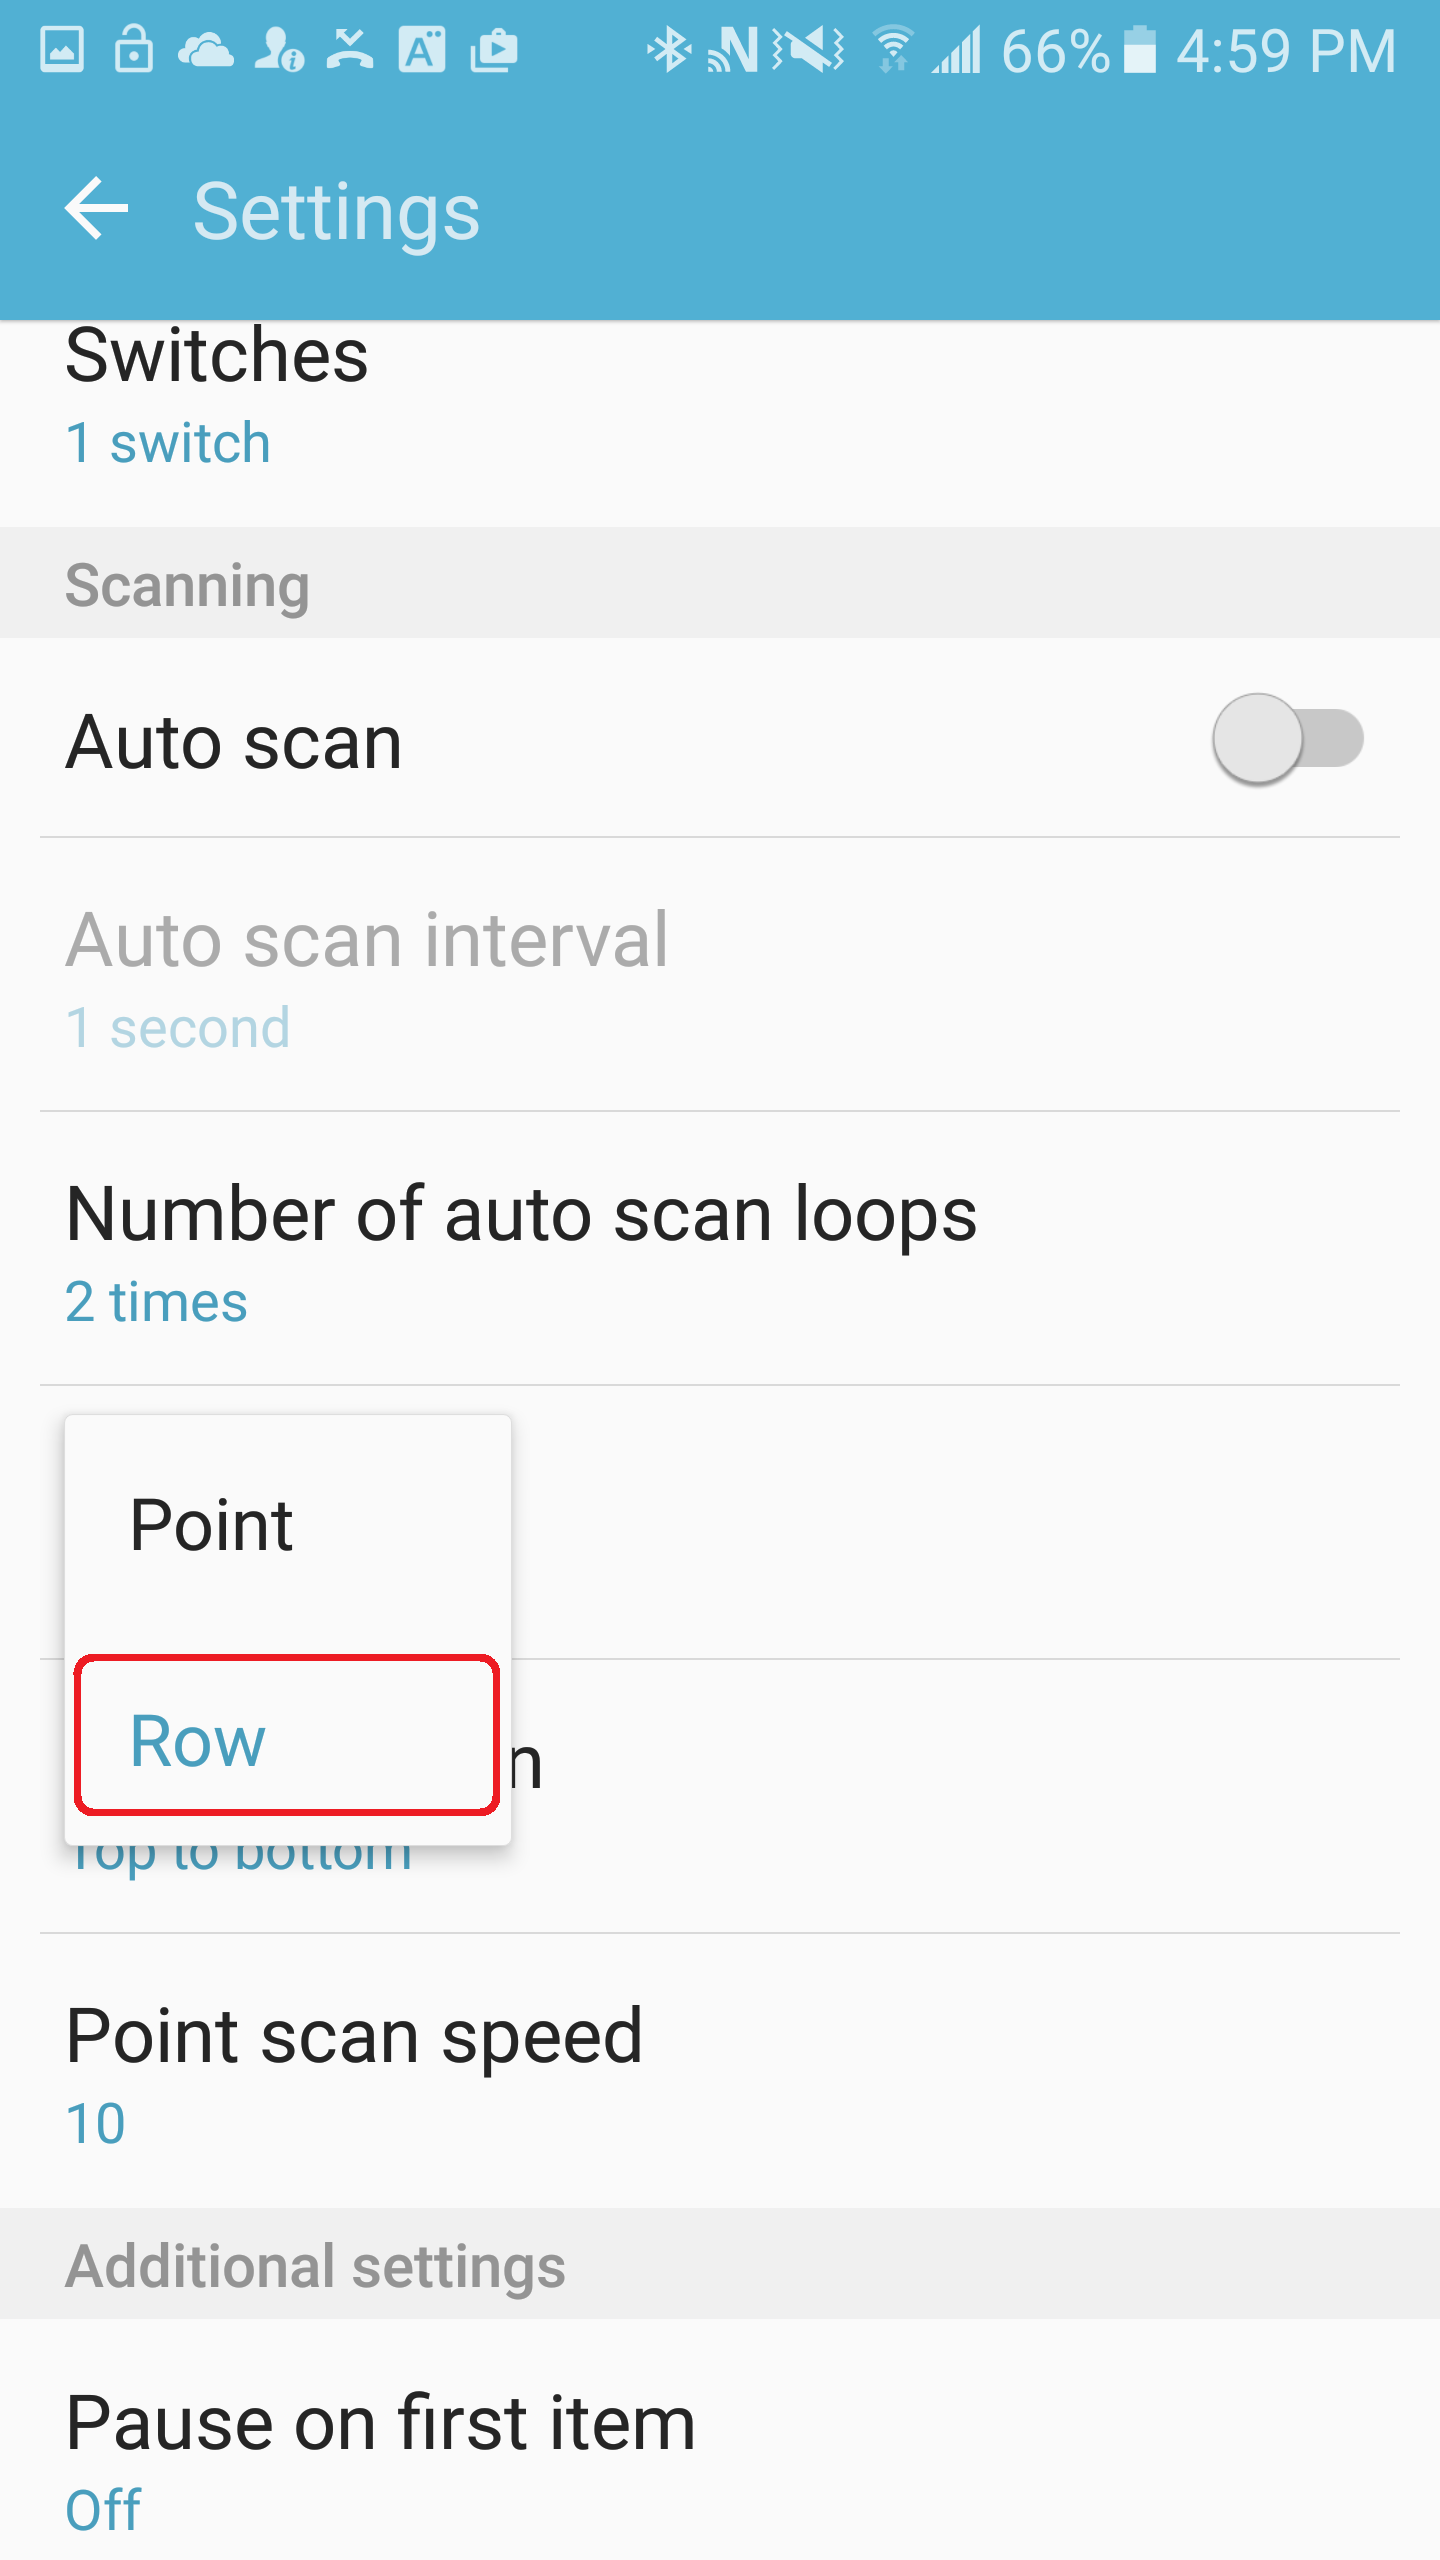
8. Select item mode scanning: on the Universal Switch settings page, go to Scan Method and Select Row.
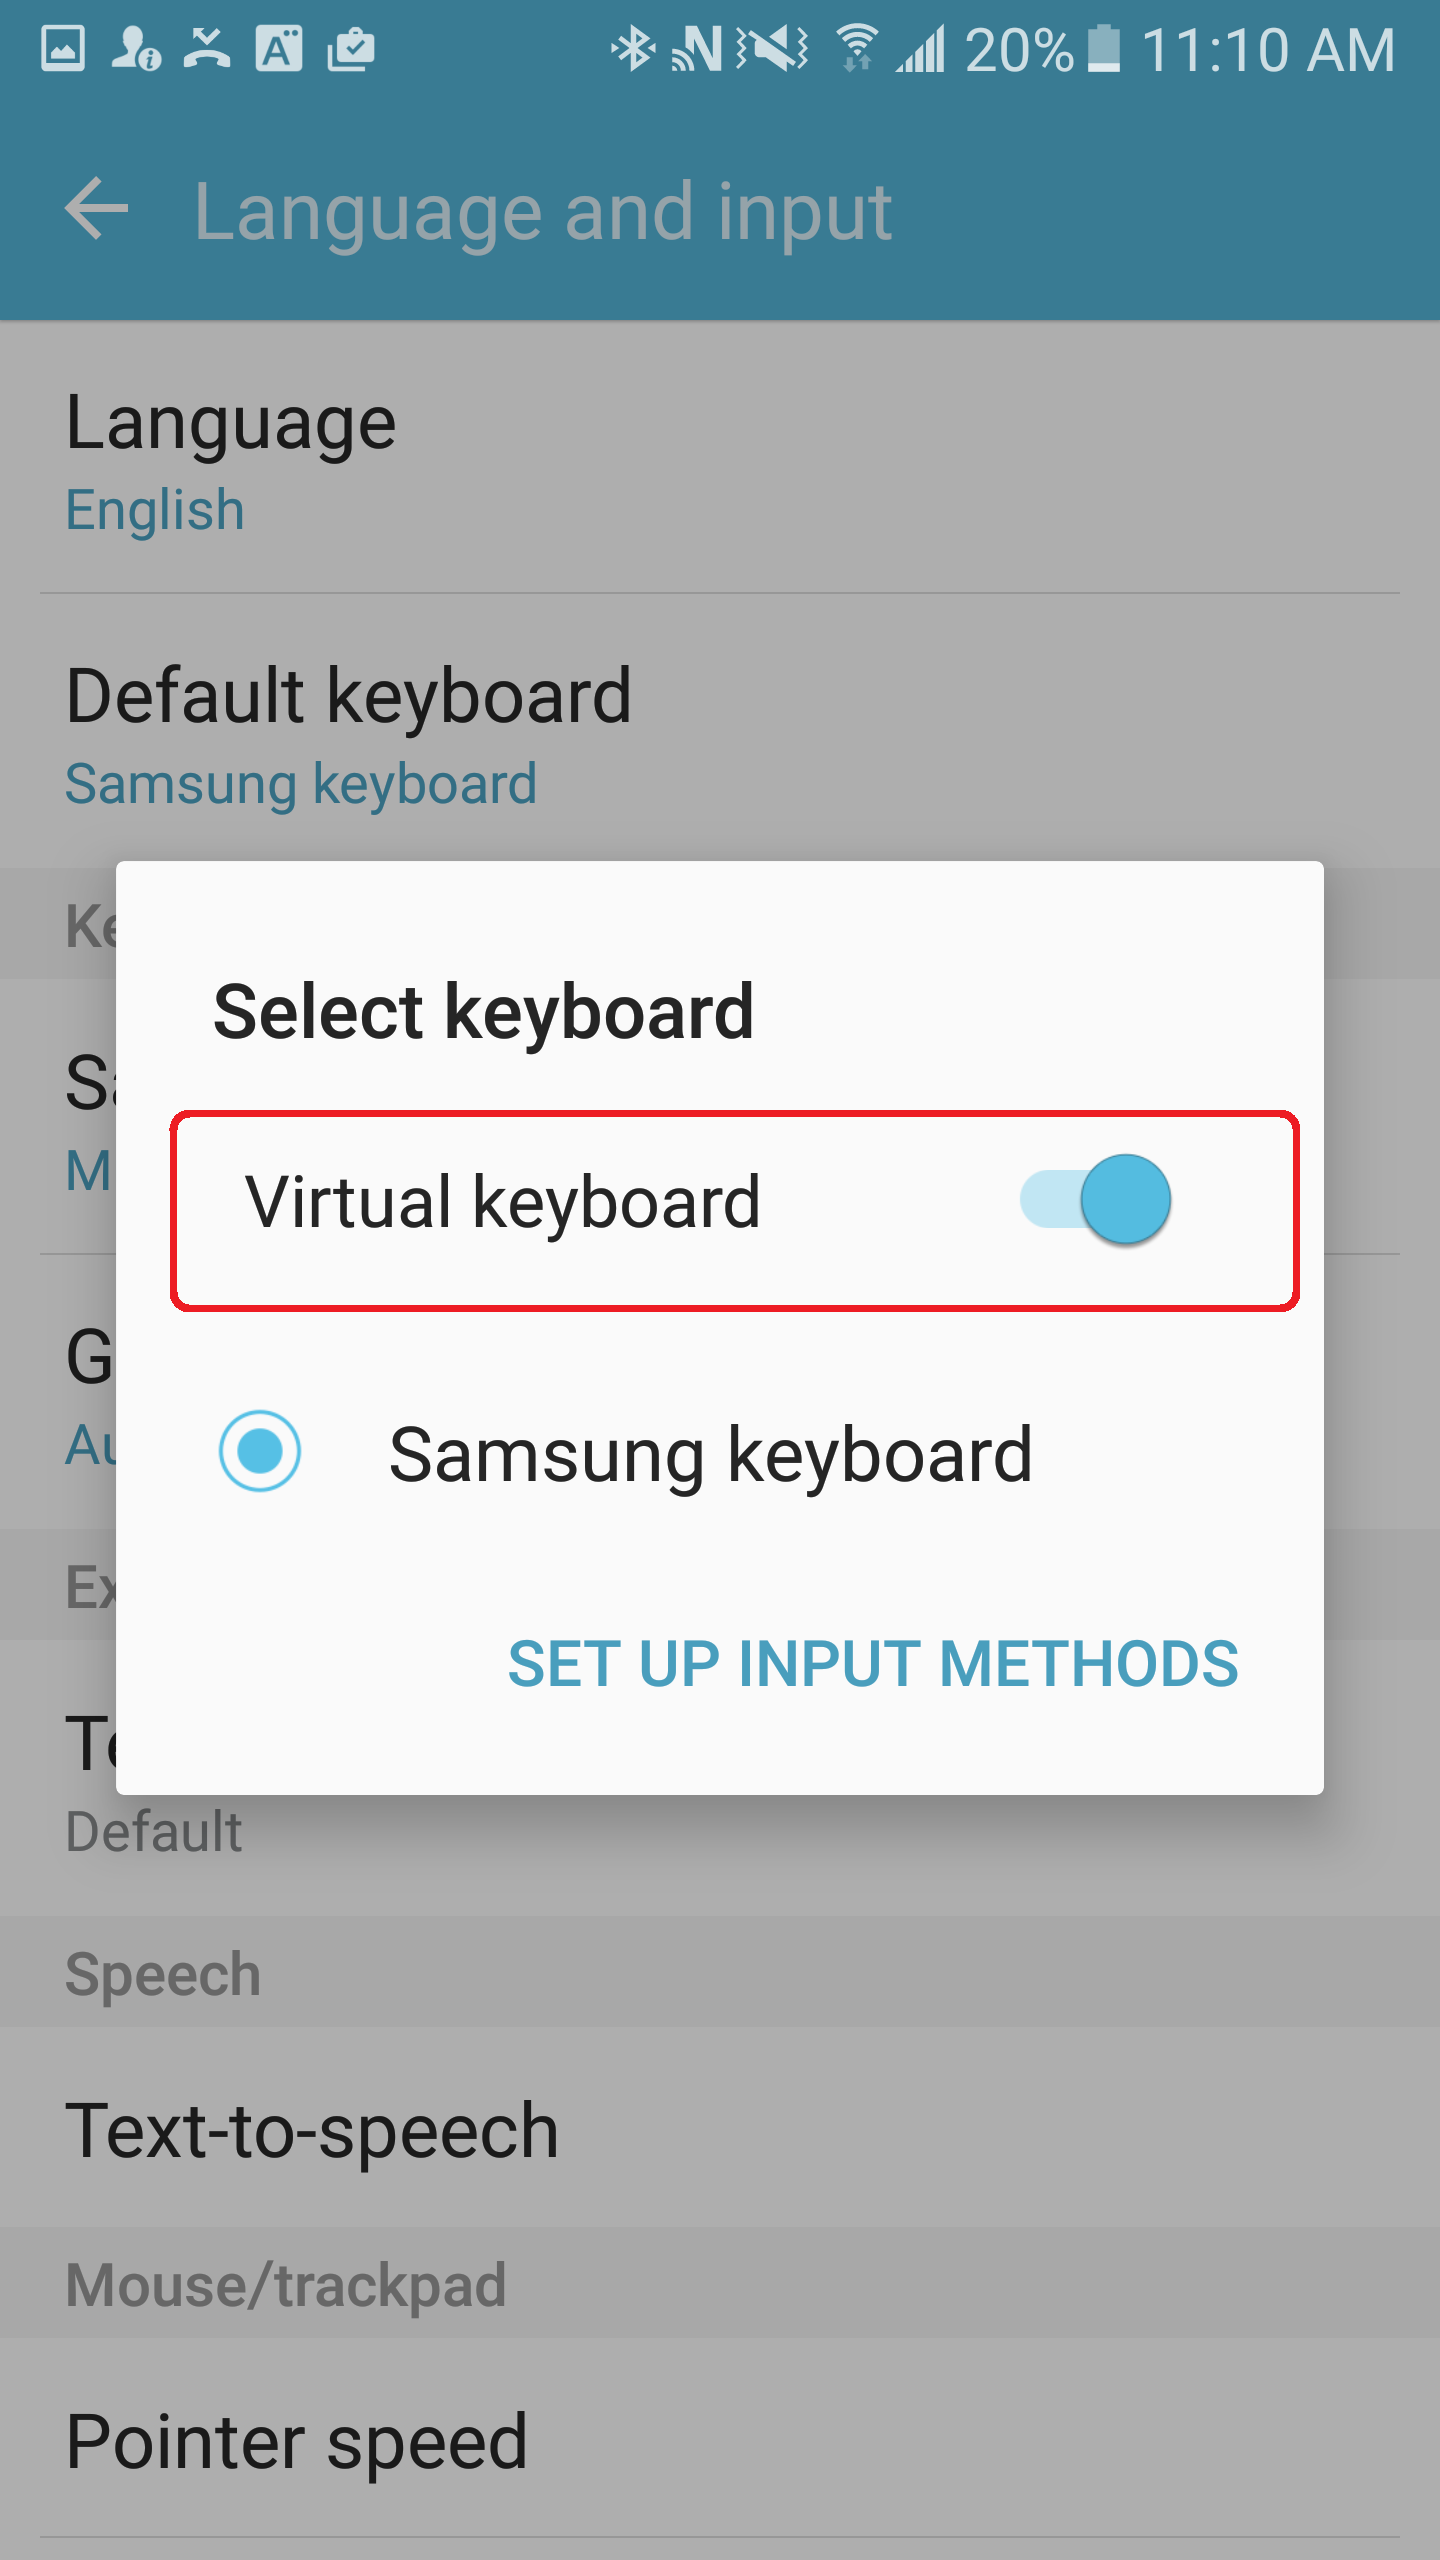
9. Ensure On-Screen Keyboard is shown: Go to System > Language and input > Default Keyboard. Make sure you have Samsung Keyboard as your selected keyboard.


10. Enable Switch Access: Go back to Universal Switch, and activate Switch Access by clicking on the on/off control. At this point, you should be able to control the Android using the Switch Control through the Tecla Shield. When you pressed any of your assigned switches you should see a frame around the user interface.

Recommended Configurations:
|
Number of Switches |
Auto Scan |
SP-1 |
SP-2 |
|
1 |
On |
Auto Scan |
- |
|
2 |
On |
Auto Scan |
Home / Back |
|
2 |
Off |
Select |
Next |
|
Number of Switches |
ECU1 Forward |
ECU2 Back |
ECU 3 Left |
ECU 4 Right |
|
3 |
Select |
- |
Previous |
Next |
|
4 |
Select |
Home / Back |
Previous |
Next |
Notes:
- For a cleaner and more accessible interface, download the Google Now Launcher (home screen replacement) from the Google play store.
Switch Actions -
- Select item – pop-up action menu related to selected item or location
- Tap - activate the selected item
- More options – extended pop-up menu giving more options related to the current screen
- Move to next / previous item - move the scan focus to the next or the previous item (this only works in row scan mode with auto scan disabled)
- Home screen, Back, Recently used apps - equivalent to pressing the corresponding hardware keys
- Back - Goes to previous step or screen.
- Increase / decrease volume - increase or decrease ringtone volume
- Open Notifications - opens the notification bar.
- View recently used apps - Shows the recently opened applications.
- Turn on / off auto scan - enable or disable auto scan in row scan mode
Settings -
- Auto scan - enable or disable automatic scanning (row scan mode)
- Auto scan interval - set the scan interval when auto scan is enabled (row scan mode)
- Number of scans - set the number of times the scan loops
- Scan method - choose between row scan mode and point scan mode. It should be noted that row scan may not work in some situations
- Scan direction - set the scan direction, from top to bottom or from bottom to top
- Point scan speed - set the scan speed (point scan mode)
Timing -
- Pause on first item - select the duration of the pause on the first item in row scan mode
- Tap duration - select how long a switch needs to be performed for it to be recognised as a switch action (this must be less than the auto tap length)
- Single interaction interval - set the length of time in which multiple switch actions are treated as a single gesture
- Auto tap - Enabling auto tap will perform a regular tap instead of bringing up the action menu when you use a switch action to select an item. You can then bring up the action menu by performing your switch action twice within the set auto tap length of time
- Auto move interval – when ‘holding down’ the switch action (i.e. keeping your mouth open) that controls moving to the next / previous item, the ‘auto move interval’ setting determines the length of time before the action (i.e. moving to the next item) is automatically repeated
Action Menu -
- Tap - perform a tap action on the selected item or location
- Gestures - including the swipe / touch and hold / drag / touch / hold then drag gestures
- Actions - you can zoom in on screen contents, rotate screen, set sound mode, open recent apps, lock your phone, open notifications, and take a screenshot
- Settings - you can change the scan speed, mode, direction, and adjust feedback
- Editing text - when you select a text input box, this menu will appear to let you select characters, move the cursor, and perform copy, paste, and cut actions
- Home - go to home screen
- Back - go to previous screen
- Keys - you can adjust ringtone and media volume, and perform Home key double press and triple press actions. In addition, you can open the device options menu, which usually requires a long press of the power key to open
Comments
0 comments
Please sign in to leave a comment.