To start your Tecla Shield should be in Switch Access / Switch Control Mode (Blinking purplish white). If you are using wheelchair controls or a joystick to control your device, your Tecla Shield should be in Mouse Keys (blinking light blue or “aqua” colour). If you are not sure how to change modes check here: Mode Change Instructions
With the Tecla Shield ready for connection – the status indicator light should be blinking white and the switches should be connected to it - follow the steps below to set up your Android device with Switch Access.
1. Pair your Tecla Shield: Go to Settings > Bluetooth. With Bluetooth enabled, you should see the Tecla Shield DOS listed under Available devices as TeclaShieldDOS-XXXX (where XXXX is a random sequence). Click on it. After a few seconds, TeclaShieldDOS-XXXX should be under Paired Devices and appear as Connected


2. Set up a Smart Lock: Once the Tecla Shield is connected, you can set it as a trusted device. This will keep your device unlocked as long as the Tecla Shield is connected to it. You’ll see a lock icon in the notification bar. Click on it and follow the steps to set up your Tecla Shield as a trusted device. 


3. Assign your switches to Switch Access actions:
a. Go to Settings > Accessibility, then select Switch Access. Click on Settings on the top right corner to go to Switch Access Preferences.
Note: If you are using a Samsung Device with Talk Back, check under 'Vision' for Switch Access if you can't find it in the main page of Accessibility.
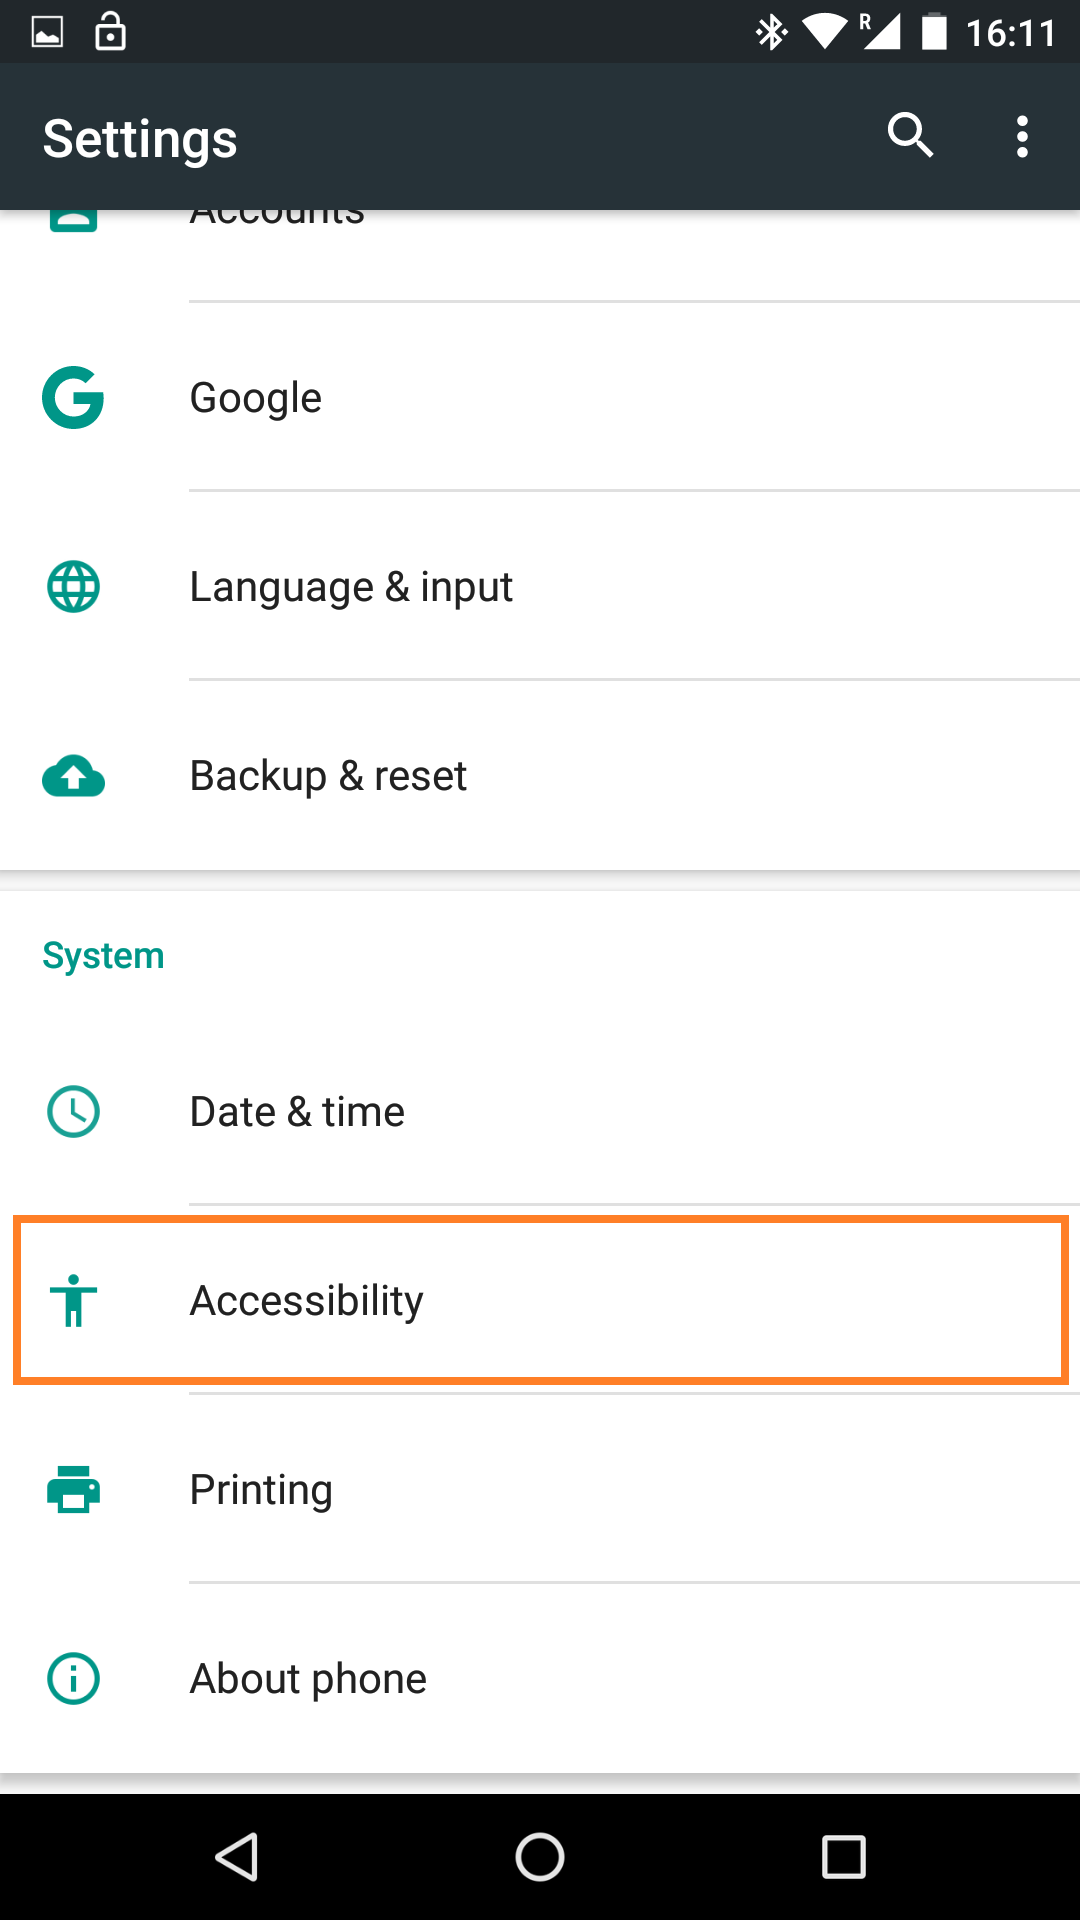
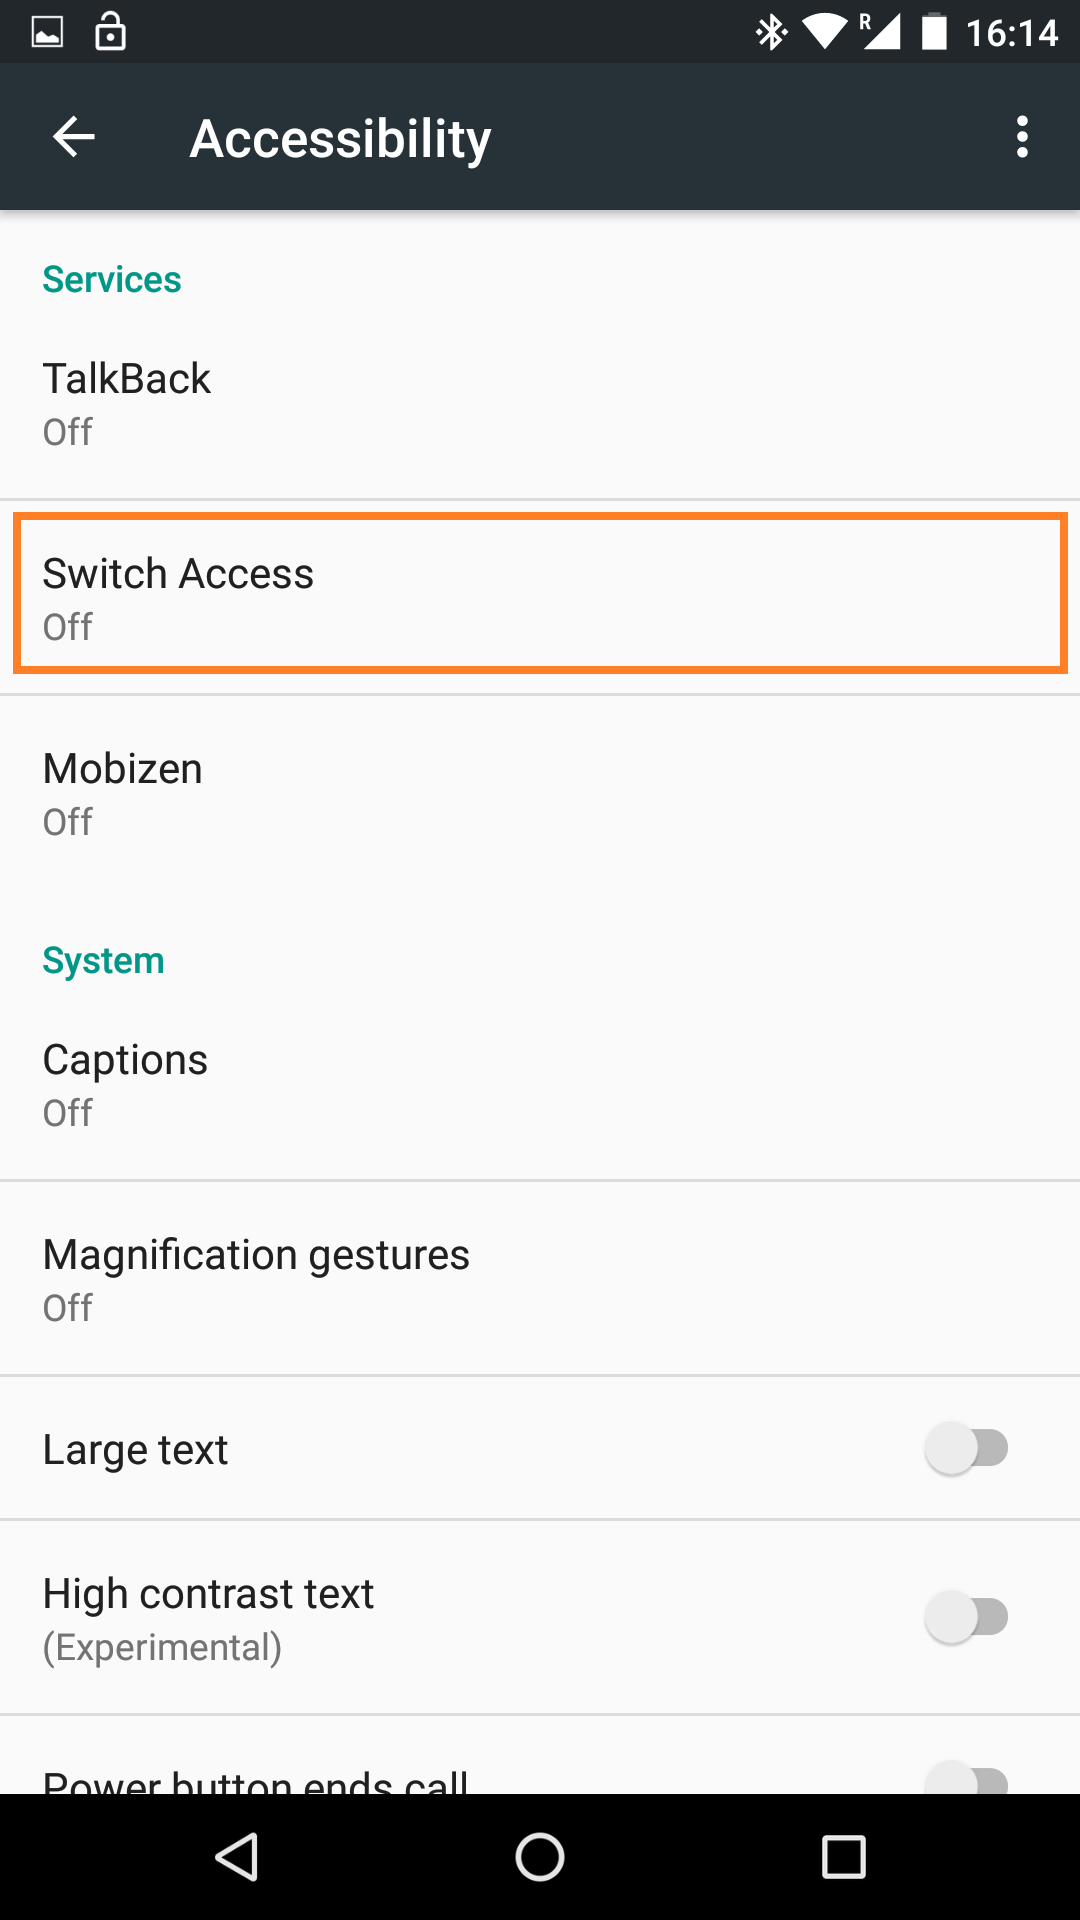
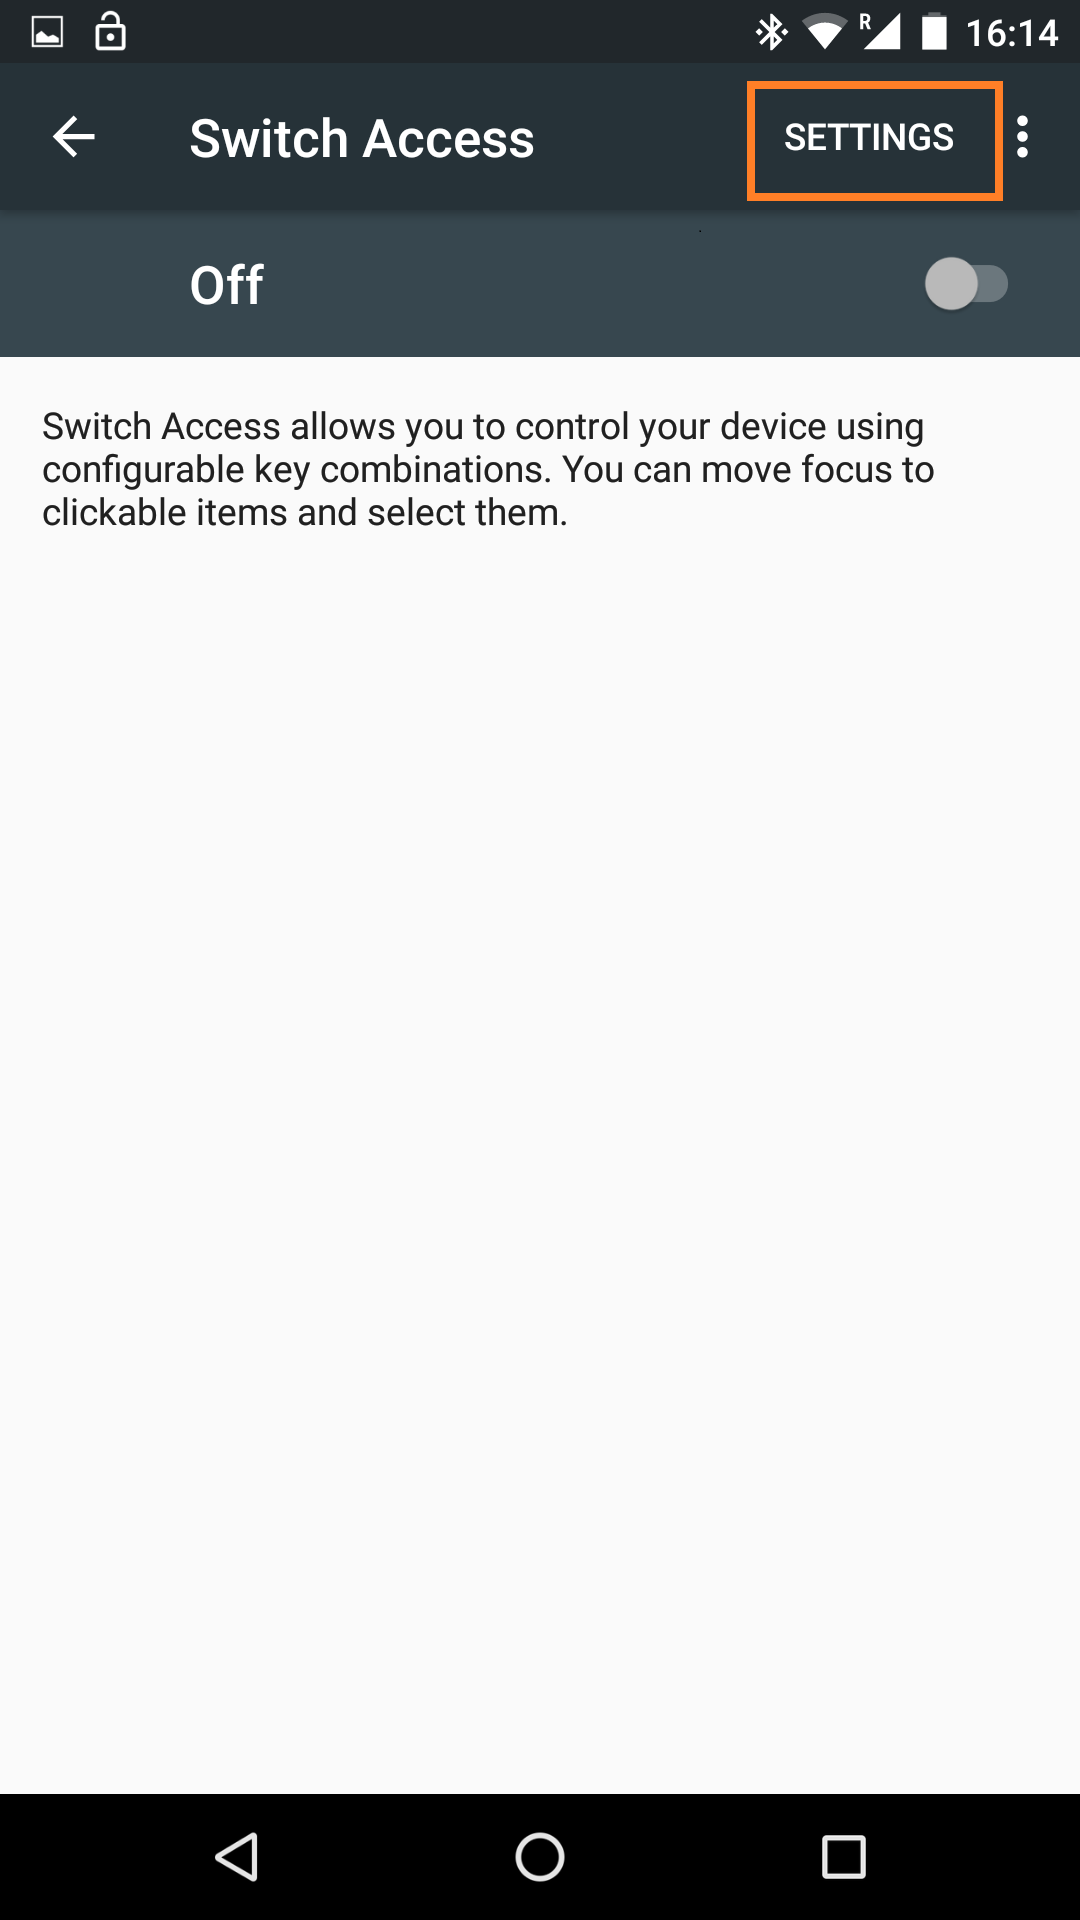
b. If you are using single-switch access, select Enable Auto Scan. A Time Delay option will now be available to set the scanning rate (the default is one second). Next, go to Assign Keys for Scanning and select Auto Scan. When the Auto Scan pop-up window appears, press the switch and click OK.

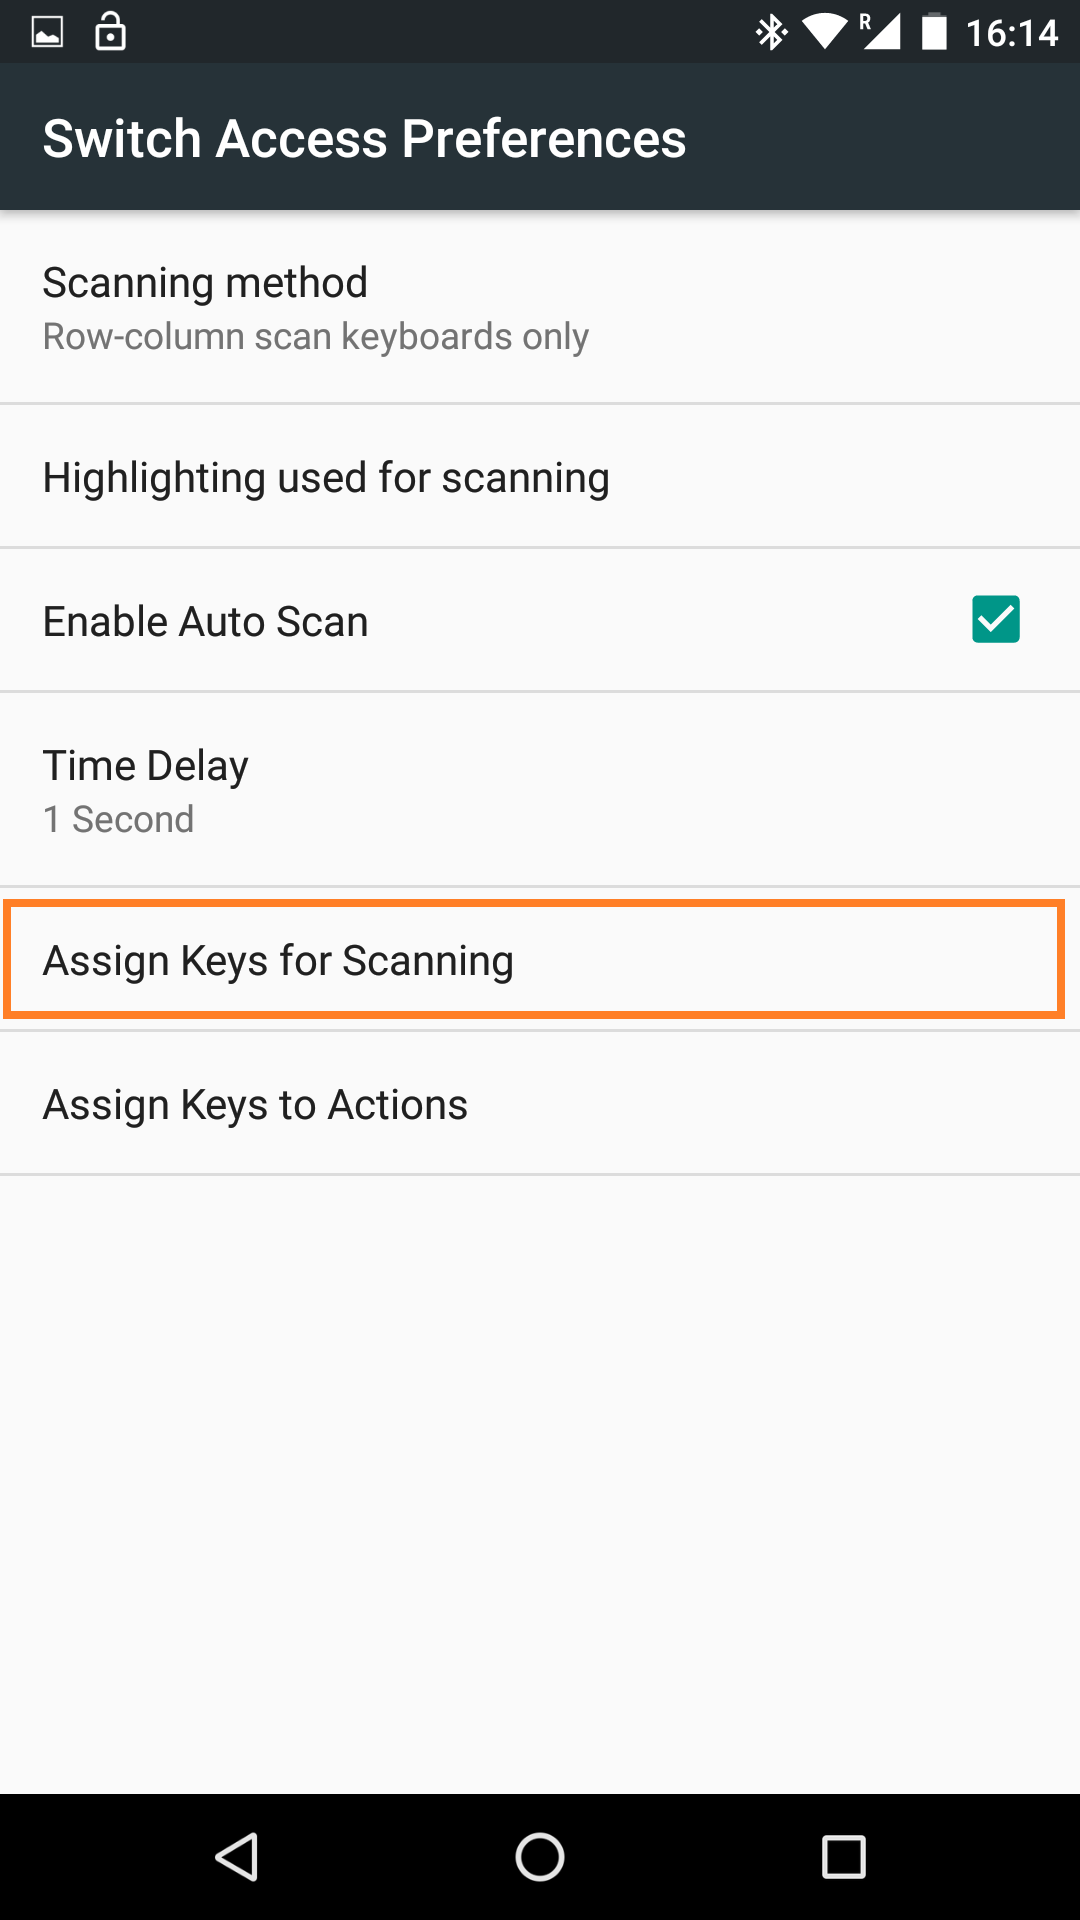

c. If you are not using Auto Scan, go to Assign Keys for Scanning, select a scanning action (i.e. Select) and when the pop-up window appears, press the switch you want to assign to that function. You’ll need to assign a switch to Select and Next for step scanning. If you have more than two switches, you can assign other actions (like Home, Back or scrolling) to switches under Assign Keys to Actions.Check Available Actions later in this guide for a brief description of other possible switch actions that you can assign to switches. The Recommended Configurations (table 1) may also be helpful for assigning switch actions.


4. Enable Switch Access: Go back to Switch Access, and activate Switch Access by clicking on the on/off control. At this point, you should be able to control the Android using Switch Access through the Tecla Shield. When you press any of your assigned switches you should see a frame around the user interface.

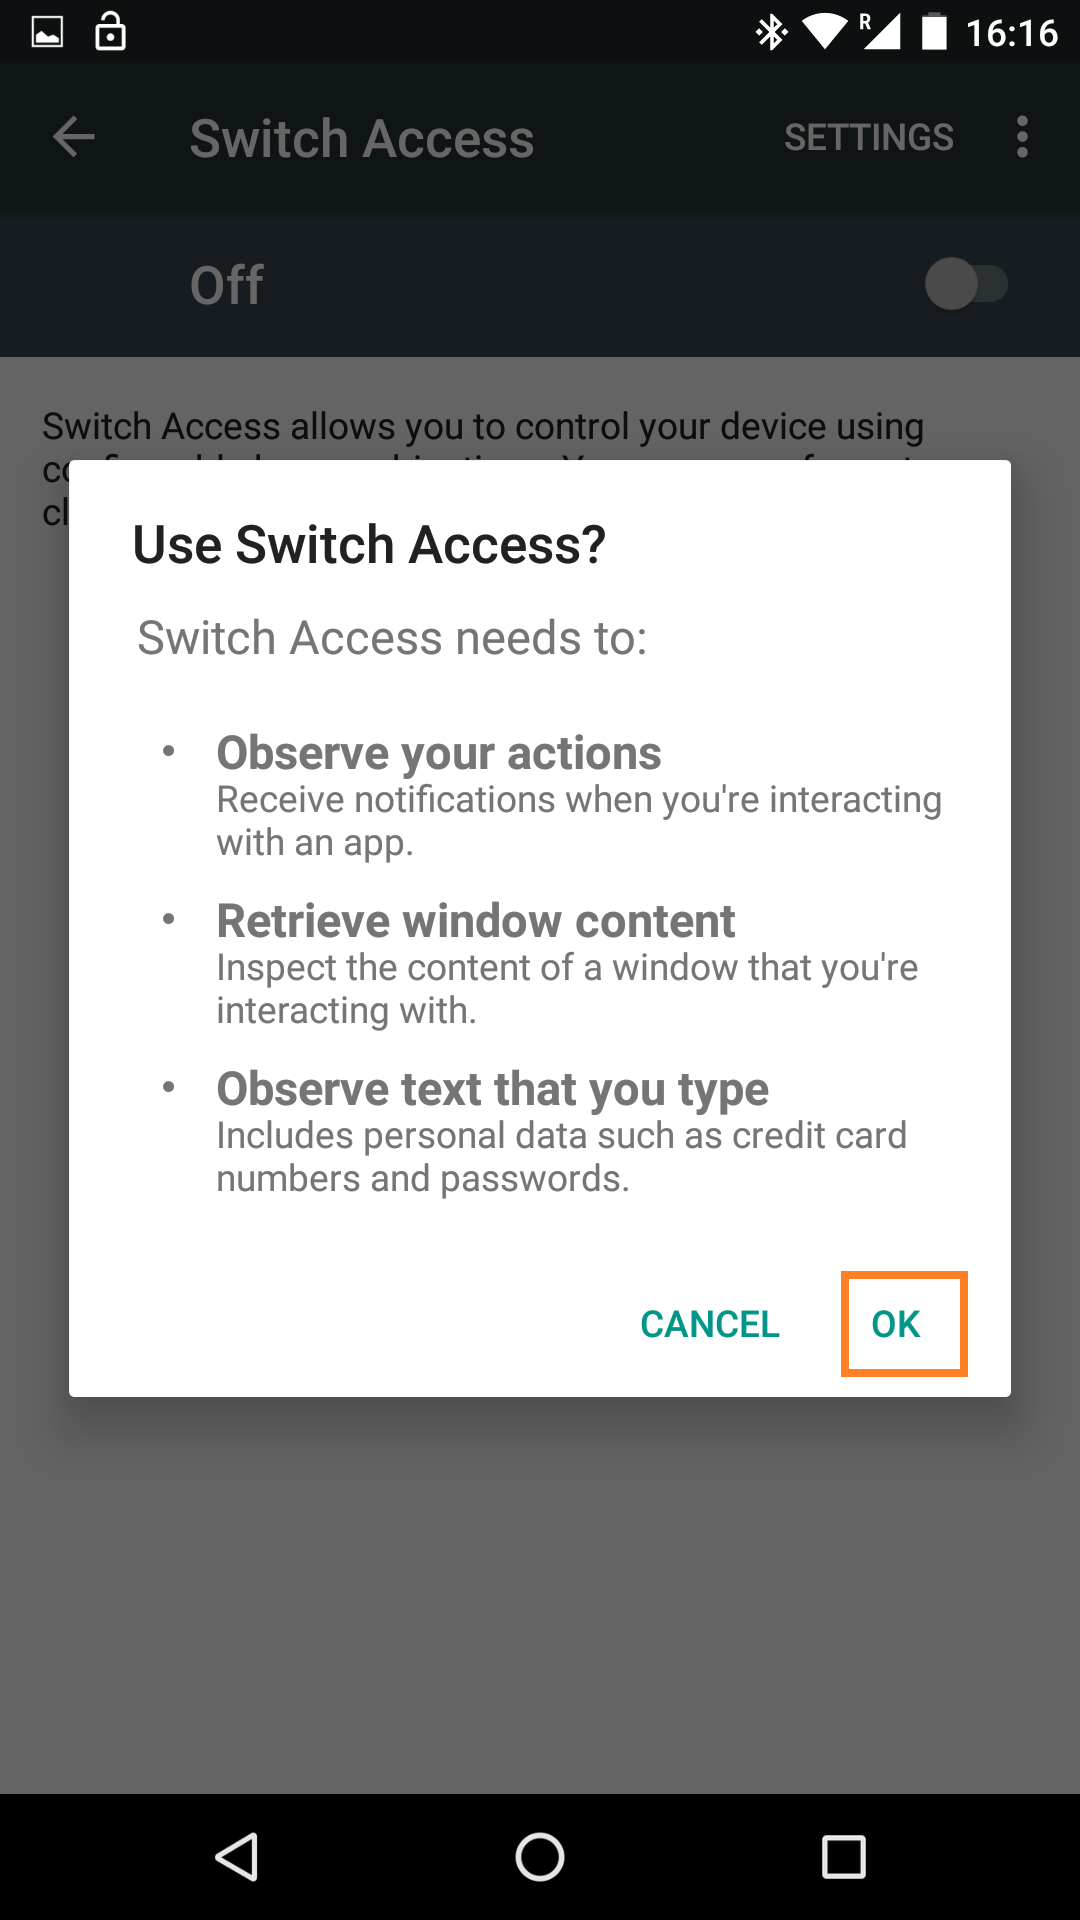
5. Ensure On-Screen Keyboard is shown: The Tecla Shield is seen as a hardware keyboard by Android, you need to tell the system to show the on screen keyboard. Go to Language & input, select Current Keyboard and enable Show input method.


Notes:
- Additional functions appear after all elements of the screen have been scanned.
- You can learn more about Switch Access and its features by visiting this website: https://support.google.com/accessibility/android/answer/6301490
Available Actions
Assign Keys for Scanning:
- Auto Scan – If you are using a single switch or require auto scan, you need to assign a switch to this action. This starts the scanning and allows you to select the highlighted item.
- Reverse auto scan – Same as above but in the opposite direction.
- Select – Select highlighted item.
- Next – Highlights the next actionable item.
- Previous – Highlights the previous actionable item.
Assign Keys to Actions
- Long Press – Performs a long press in the highlighted item. This provides additional functions (i.e. deleting a message)
- Scroll Forward – Scroll forward on the current view if it’s scrollable.
- Scroll Backward – Scroll backward on the current view if it’s scrollable.
- Back – Sends a Back button event.
- Home – Sends a Home Button event.
- Notification – Opens the Notification Bar.
- Quick Settings – Opens Quick Settings.
- Overview – Shows the recent applications.
Recommended Configurations
|
Number of Switches |
Auto Scan |
SP-1 |
SP-2 |
|
1 |
On |
Auto Scan |
- |
|
2 |
On |
Auto Scan |
Home / Back |
|
2 |
Off |
Select |
Next |
|
Number of Switches |
ECU1 Forward |
ECU2 Back |
ECU 3 Left |
ECU 4 Right |
|
3 |
Select |
- |
Previous |
Next |
|
4 |
Select |
Home / Back |
Previous |
Next |
Further Customization
You can further customize Switch Access to meet your needs, here are the available options:
- Scanning Method: You can select from Row-column scan keyboard only (other items are scanned item by item), Row-column scan everything (all items are scanned first in row and once row is selected item by item) and Option scanning (where all items are divided in halves that you select until you get to the item desired).
- Highlighting used for scanning: Here you can select the colour and thickness of the highlighting frame.
- Enable Auto Scan: Enables auto scanning and gives you Auto Scan as a assignable action for a switch. When enabled a 2nd setting appears for Time Delay to set the scanning rate.
- Assign Keys for Scanning: You can assign additional scanning actions to switches.
- Assign Keys to Actions: You can assign additional system actions to switches.
Comments
0 comments
Please sign in to leave a comment.